

My kids have been asking to make kaleidoscopes for years—and I mean years! The last time we bought a roll of tinfoil, I thought, “Hmm, let’s give it a try.” They turned out remarkably well—they actually worked! The little guys needed help with the finishing touches, but they would have been just as happy at the halfway mark with something to peer through.
Materials:
- paper
- construction paper (optional)
- card stock
- crayons or markers
- pencil
- glue (we used model glue and glue sticks)
- tin foil
- plastic bags
- glitter and sequins
- tape
Instructions
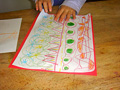
- Start by decorating the paper however you desire with your crayons or markers. We stuck our decorated papers onto construction paper to make them a bit sturdier.
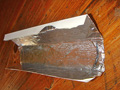
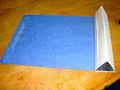
- Stick some tinfoil onto the card stock, shiny side facing out.
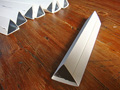
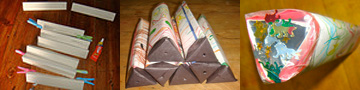
 Make three folds (four sections) in your foil-covered cards. Put glue along one side and fold the cards into “triangular tubes.” Glue them shut and wait for them to dry.
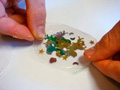
 - While the glue dries, cut little circles out of plastic bags. Put a strip of glue on one circle and drop glitter and/or sequins into the center. Then,
 drop the other plastic circle on top and let the whole thing dry. Now you have little pockets filled with glitter and sequins.
 - Roll your decorated paper around your “triangular tube” and glue it down. (For younger kids, the project can end here if they get tired or distracted. For older kids—let’s persevere!)
- Cut out black circles
 from the card stock and make a hole through the center with a pencil. Then fold the circle over one end of the tube and tape it on. (We lost patience with waiting for glue to dry—tape to the rescue!).
 - Finally, tape a glitter and sequin “pocket” onto the other end of the tube.
This is a great, mesmerizing craft that won’t get old with your kids!
SOURCE:http://www.pbs.org/parents/crafts-for-kids/diy-kaleidoscopes/