
Have you ever wondered how to create or repair leather items without using an industrial sewing machine? Here, we show you how to make beautiful leather pieces using a manual “saddle stitch” technique. You will need the right tools, so be sure to stock up before getting started. If you want to delve deeper and learn more about hand-sewing leather, start by reading Al Stohlman’s book The Art of Hand Sewing Leather. It’s a favorite of mine and a phenominal resource.
Materials
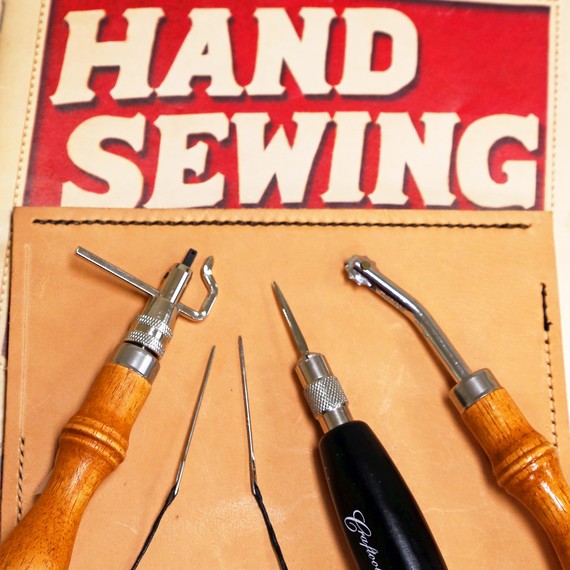
In this tutorial, you’ll learn how to use the following materials for hand-sewing:
– Stitching Groover
– Overstitch Wheel
– Stitching Awl
– Leather Stitching Needles
– Waxed Thread (Linen or Nylon)
– Rubber Cement
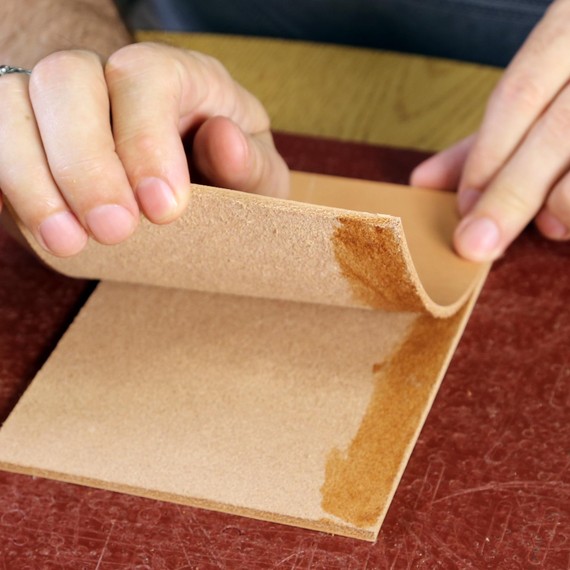
Step 1: Using Rubber Cement
To get started on hand-sewing leather, I like to use rubber cement; It helps hold the leather together while sewing, but it offers a light enough bond to allow a second chance to line things up to precision. Apply a light coat of rubber cement to both pieces of leather, then press them together when the cement is nearly dry.
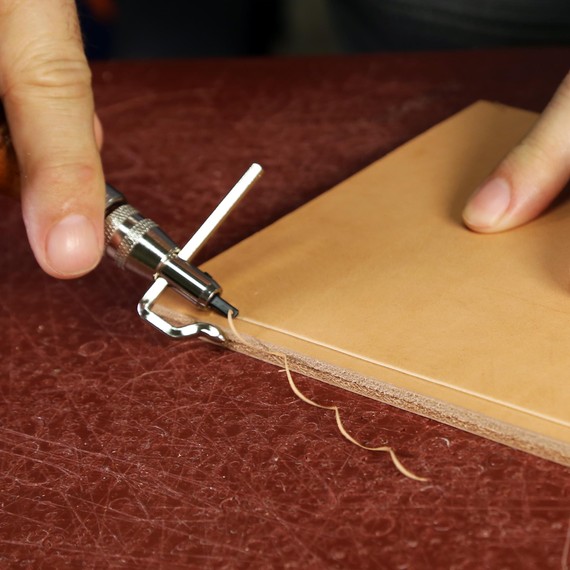
Step 2: Getting Groovy
Now that you have things secured in place, put a groove on the leather with a Stitching Groover. This tool does two things: It presents a nice straight line to stitch on and removes a small amount of leather to provide a trench that the stitch can sink into — which can help protect the thread.

Step 3: Marking Stitch Spacing
Utilizing the groove you just made, use an overstitch wheel to mark the thread spacing. Overstitch wheels come in different sizes that can vary the length of your stitching. The number six being used in this tutorial. The number refers to the amount of stitches per inch.
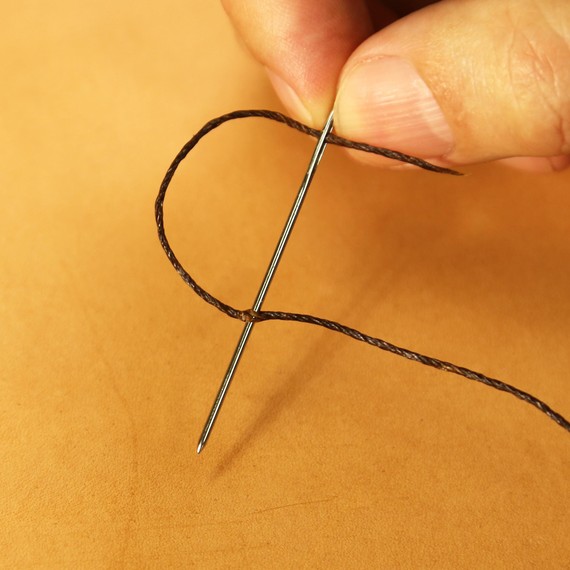
Step 4: Locking The Needle
To begin, you will need a length of thread 3 times the distance that you plan to sew. For the “saddle stitch”, use two needles: one on either end of the thread.
A trick I like to use when sewing is to lock the needle into the thread. After running the wax thread through the needle eyelet, pull it through about an inch. From there, pierce the thread with the needle point (as shown) and push this loop around the needle upwards towards the eyelet. With end of the thread that initially passed through the eyelet, pull out the slack that was created with this adjustment. Holding the needle, pull the loop over the eyelet to lock the needle in place.
By securing the thread this way, you won’t have to worry about it sliding off of the needle while you sew. Repeat on the other end so you have two needles on the thread, one on each end.
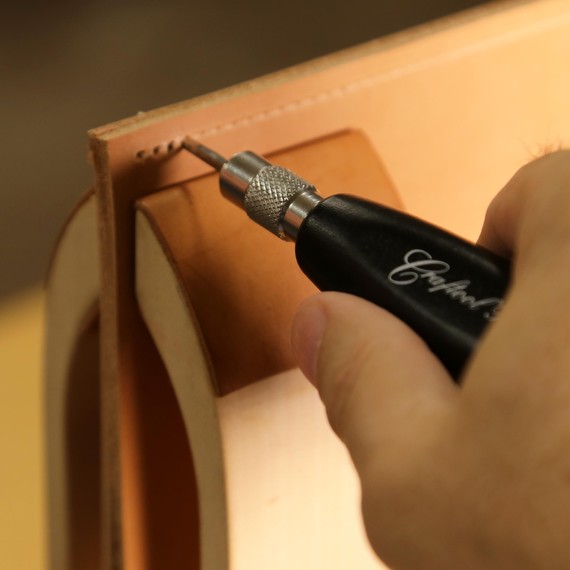
Step 5: Using A Stitching Awl
Next, create holes in the leather that you can sew through. A stitching awl, used here, is the best tool for the job. The awl is reminiscent of an ice pick, but it has a diamond-shaped blade with sharp cutting edges to pierce holes into the leather rather than tear holes, as a round metal point would. Pierce through the leather on each of the dots created by the over stitch wheel. Make sure that you keep the awl at a 90-degree angle when piercing the leather to ensure that the spacing is consistant on each side for uniform stitching.
In the following steps, I will be using a stitching pony to help with the process. This is an optional accessory, however it is handy to have around as an extra hand to help hold the project in place while working on it.
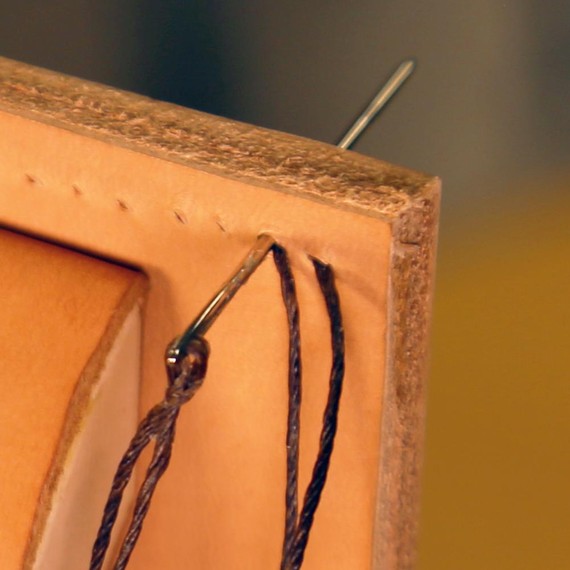
Step 6: Get Stitchin’
To begin your stitch, sew through the first hole, making sure the lengths of thread are even on each side. From there, continue to sew through the same hole with both needles, each time passing through the same hole from opposite sides. Continue this back-and-forth sewing technique, pulling the thread snug with each pass, until you have reached the end of your project.
If you are having difficulty with the needles getting stuck in the leather, try widening the holes further with the stitching awl and/or using a pair of needle-nosed pliers to help pull through the leather.

Step 7: Locking The Stitch
When you have completed your stitching, you will want to lock the stitch in to place. Sew back a few stitches, pull the thread down snug, and cut the thread flush against the project.
Like this tutorial? Watch the video below to learn how to make a leather bracelet!
SOURCE:http://www.marthastewart.com/1125947/how-sew-leather-hand