

Do you look forward to decorating Easter eggs each year as much as I do? The only problem I have with egg decorating is the eggs last only for a couple weeks — then you have to throw away your pretty creations and start over again next year! This Easter, I’m skipping the hard-boiled eggs and trying out some new egg-decorating techniques that can be enjoyed year after year. These painted eggs use two of my favorite craft supplies — Martha Stewart Multi-Surface Paints and papier-mache eggs. The juxtaposition of the kraft paper with a vibrant paint color gives the eggs a modern and fresh feel. Plus they’ll look just as great next year!
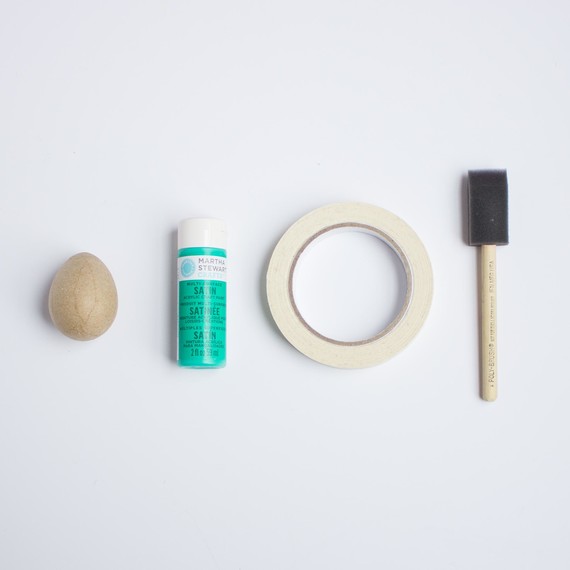
Materials
– Papier-mache eggs
– Thin masking tape
– Martha Stewart Multi-Surface Craft Paint (I used these colors: Diving Board, Emerald City, Mermaid Teal, Pumpkin, and Magenta Rose)
– Foam brush
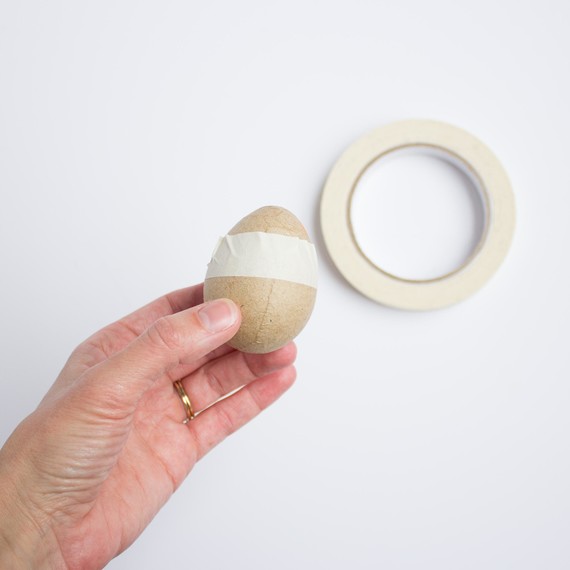
Step 1:
Tape off the bottom half of the egg with a piece of masking tape. Position the tape at an angle to get a more modern look. Smooth the bottom edge of the tape down with your fingernail to ensure that no paint seeps through.
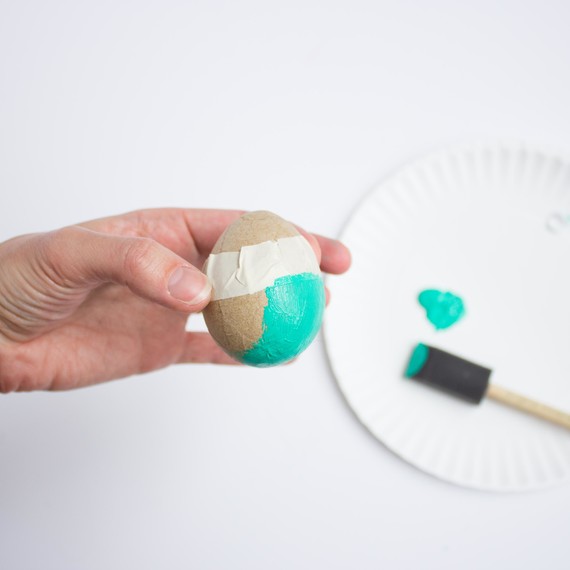
Step 2:
Use your brush to apply an even layer of paint to the bottom part of the egg. Let dry completely and add a second coat.
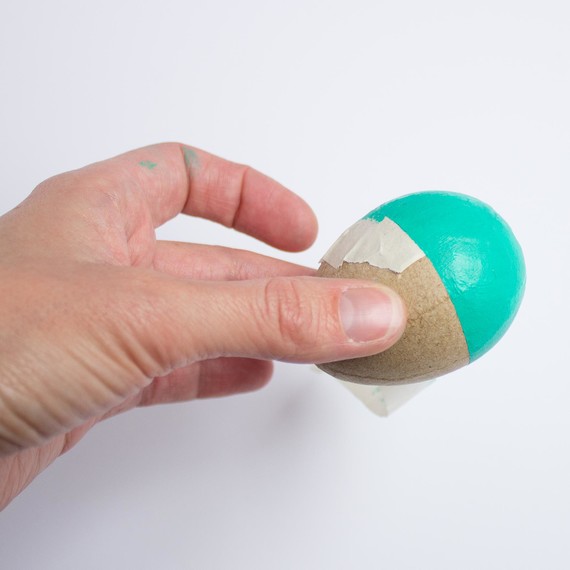
Step 3:
Carefully peel away the masking tape to reveal your finished egg!

I hope you round up your favorite colors of Martha Stewart craft paint and give these a try this Easter!
SOURCE:http://www.marthastewart.com/1107175/painted-papier-mache-easter-eggs