

Now that my child has entered toddlerhood, I’m thinking about the idea of play differently. When she was small, I would often put her on a blanket with a variety of toys to encourage her to crawl around and explore. It was also interesting at that younger age to see what she was gravitating toward. Now that she’s older, I’m trying to get better at playing in more compartmentalized ways. She has accumulated so many toys in her 16 months of life that it’s a little overwhelming, and I’m trying to streamline it. (Disclaimer: This is not like a “play theory” nor is it from some super popular book on raising the world’s smartest toddler. I’ve admittedly been reading mostly fiction this summer.)
Lately I’ve been trying to encourage play with one type of activity at a time — blocks or books, puzzles or push toys — and then we put that one away before starting something different. I tried creating a cabinet in the kitchen of all kid-friendly things that she could play with while I make dinner, which worked at first, but then one cabinet led to the next and I found myself spending more time pulling glass dishes from her hands than prepping dinner. That’s when I had the idea for this magnetic kids’ game!
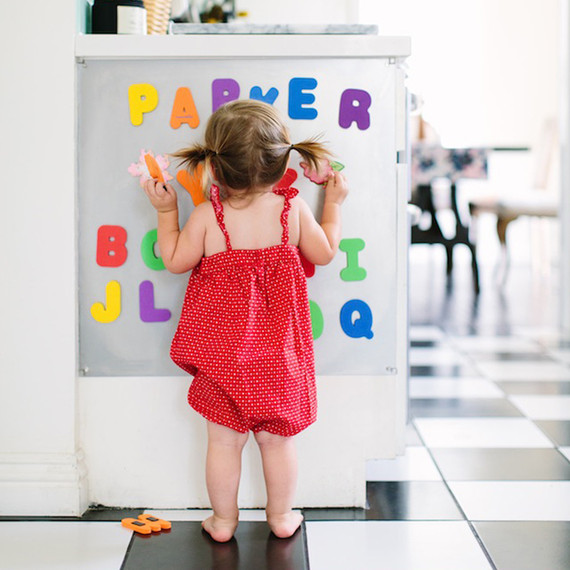
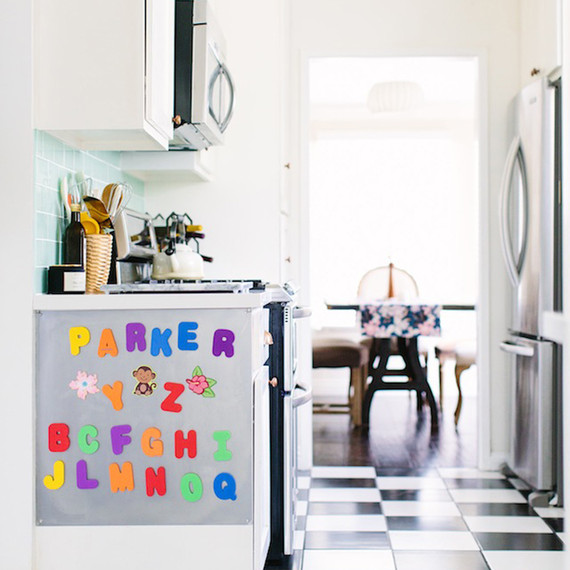
It’s really simple and inexpensive to make, and can occupy her for decent chunks of time while I’m cooking right next to her. We have been working a lot on teaching her new words, colors, and letters so I wanted a way to incorporate that here without spending a lot of money on pricey magnets. I used bath letters and adhesive magnet tape to turn them into magnets. I also picked up some simple wooden animals and added magnets to those. You guys, there’s no end to magneting possibilities!
Materials:
- Stainless-steel or other magnetic metal board (measured to the width of your cabinet or wall)
- Drill
- Metal screws and washers
- Foam bath letters (ours are from Munchkin)
- Adhesive magnet tape
- Hot-glue gun and glue

- Start by measuring the side of the cabinet that you want to apply the board. Then head to a home-improvement or hardware store to find a metal sheet that will fit. I liked the aluminum sheet because it is so lightweight, but tested it with a magnet and realized it wasn’t magnetic. That would have been a real bummer to get home with! I lucked out and found this sheet of stainless steel that was the perfect width. It was around $20.
- Next drill a hole in each of the four corners for hanging. When hanging, apply a small metal washer between the screw and the board and get the board as tight to the cabinet as possible. This will keep any sharp metal edges or corners from sticking out and becoming hazardous.
- I purchased some magnetic foam letters, but quickly found out that Parker actually liked to peel the magnetic tape off of the back of them, so I would recommend actually hot-gluing the magnet tape pieces to the back of each of the foam letters.
- Now, while you cook, just shout out random things for her to pick out and peel off.
Voila! Hopefully you’ve bought yourself an extra 15 minutes in the kitchen, which means everyone wins!
Photography by Mary Costa
SOURCE:http://www.marthastewart.com/1500592/awesome-diy-magnetic-kids-game-keep-your-child-busy