If you are anything like us, you probably have at least a few small toy cars rolling around your house! My kids love playing with cars, and this cardboard parking garage project is one of their favorites.
Materials:
- 4 paper rolls, the same length and diameter
- paint and paintbrushes (optional and for painting paper rolls)
- hot glue gun and glue sticks or strong glue (or rubber cement)
- 2 large, wide cardboard rectangles cut from a cardboard box (about 13 x 16 inches)
- 1 long, thin cardboard rectangle cut from a box (about 4 x 12 inches)
- markers
Instructions
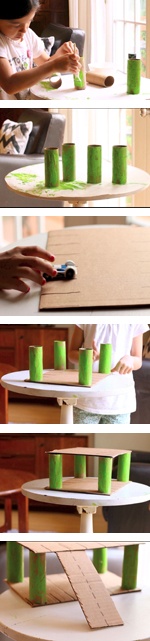 Cover a work surface area, then paint your paper rolls any color you wish and allow them to dry.
- Using a marker, create parking spaces by drawing little lines on the two large cardboard rectangles. You can use a toy car as a template for line spacing.
- Lay one of the large rectangles, with the parking lines already drawn, face up on your work surface, then glue the four paper rolls to it, one in each corner.
- Lay the second large rectangle on top with the parking lines facing up. Once you position it in a place that looks right, glue the second rectangle to the top of the cardboard rolls.
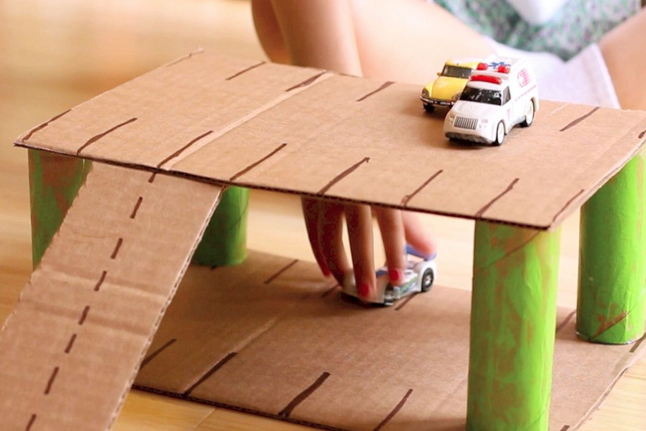
- On your thin, long rectangle, draw dotted lines down the center to make two traffic lanes. Glue this rectangle to the top rectangle platform to form a ramp.
That’s it! Now you’re ready to zoom around, roll down the ramp and park some cars in your new garage!
SOURCE:http://www.pbs.org/parents/crafts-for-kids/cardboard-parking-garage/