

The Shrinky Dinks you buy in the store shrink to approximately a third of their original size and actually become nine times thicker after just two magic minutes in the toaster oven. I’ve found another kid-friendly way to make these plastic toys by reusing old containers! Here’s how:
Materials:
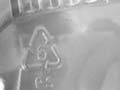
- plastic container (with the “6” sign, as pictured in Step 1)
- scissors
- permanent markers
- small sheet of aluminum foil
- hole punch (optional)
- toaster or conventional oven
Instructions
- Trim the edges off of your plastic container, leaving a flat surface. Make sure your plastic has that “6” sign or it won’t work properly!
- Draw and color your shape. It can be anything you want! I’m not great at freehand drawing, so I taped my plastic to my computer monitor and traced my
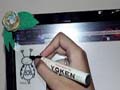 ladybug like so:
 - Cut and measure your plastic. Mine was between 2-3 inches long. If you want to make a necklace or keychain, now is a good time to punch a hole in the top of your item.
- Preheat your oven to 350 degrees Fahrenheit.
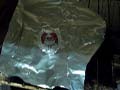
- Rip or cut a piece of aluminum foil and place it on your oven rack. Place your plastic ornament on the foil tray.
- Watch it shrink! At first the plastic will curl like crazy, but eventually it will be flat and tiny. Baking should take one to three minutes.
- Let the plastic cool for a minute or so after taking it out of the oven.
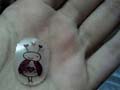
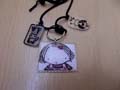
Enjoy your homemade Shrinky Dinks!
SOURCE:http://www.pbs.org/parents/crafts-for-kids/upcycled-shrinky-dinks/