
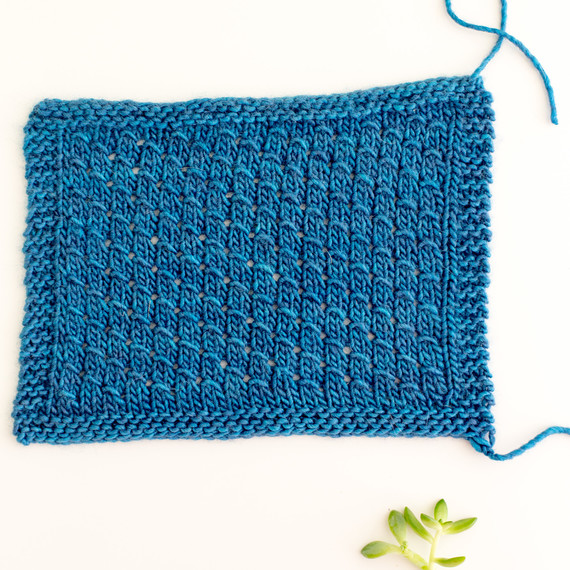
I love playing with different stitches in knitting. I especially love how slipped stitches and passed over stitches add a fabulous texture to a knit fabric. This stitch looks fancy, but you can make it with ease. To create this stitch, I tried a variation on the traditional Diagonal Scallop. The changes make the stitch easier to knit, and also add a mildly lacy and mesh feel to the fabric which I love. I call it the Lacy Diagonal Scallop Stitch. Try adding simple slipped stitch knitting patterns to basics you love, crew neck sweaters, hats, or scarfs, to breathe new life into old favorites.
It’s so easy to follow these instructions, so don’t be scared. Dive in and try something new! My suggestion when trying any new stitch is to make a full swatch (6 x 6 inches) so you can really get a feel for the pattern, how it will hang, and understand its true gauge. You may need to adjust old favorite knit patterns accordingly. Note, I created a border around each swatch with three to four rows of garter stitch on the bottom and top, and with three stitches of garter stitch on either side.

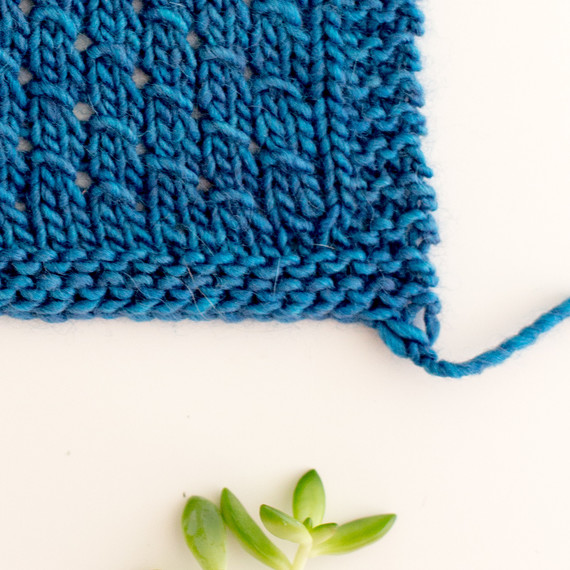
This is the wrong side of the Diagonal Scallop stitch.
Lacy Diagonal Scallop Stitch Pattern
Note: Cast on a multiple of 4 stitches plus 2 more over 4 rows.
To make the Diagonal Scallop Stitch lacy, I “make 1” by bringing the needle from front to back. To make a more solid fabric (and the more traditional Diagonal Scallop stitch), “make 1” by bringing the needle under the running thread from back to front.
Row 1: Purl (this will be the wrong side of the work).
Row 2: K1, *make 1 by inserting needle under the running thread before the next stitch from front to back, k2, pass the made stitch over the 2 knit sts; k2; repeat from * until 1 stitch remaining, k1.
Row 3: Purl.
Row 4: K3, *make 1 by inserting needle under the running thread before the next stitch from front to back, k2, then pass the extra strand over the 2 knit sts; k2; repeat from * until 1 stitch remaining, k1.
Repeat rows 1-4 to form the pattern.
Below, I show detailed photos and descriptive instructions to illustrate how the pattern works. These are not meant to replace the instructions above but to highlight specific aspects of it.
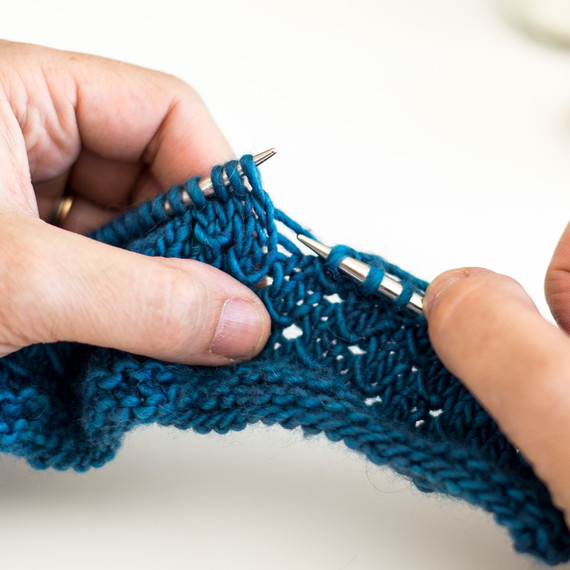
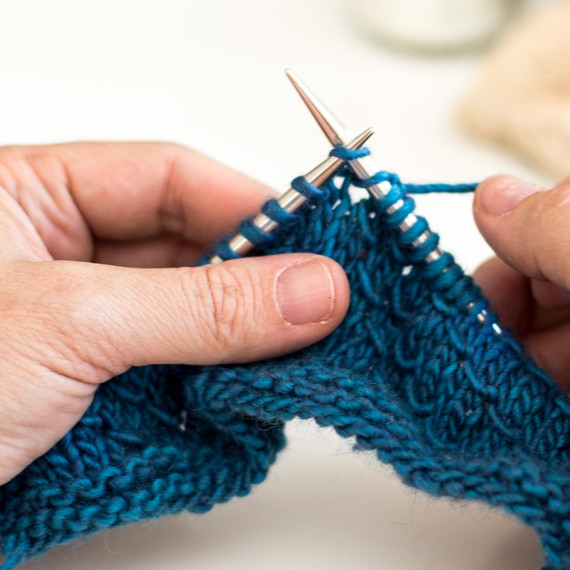
Use the running thread shown above for the “make 1.”
Pick up the running thread to “make 1” by bringing the needle under this strand from the front to the back.
Knit the next 2 stitches.
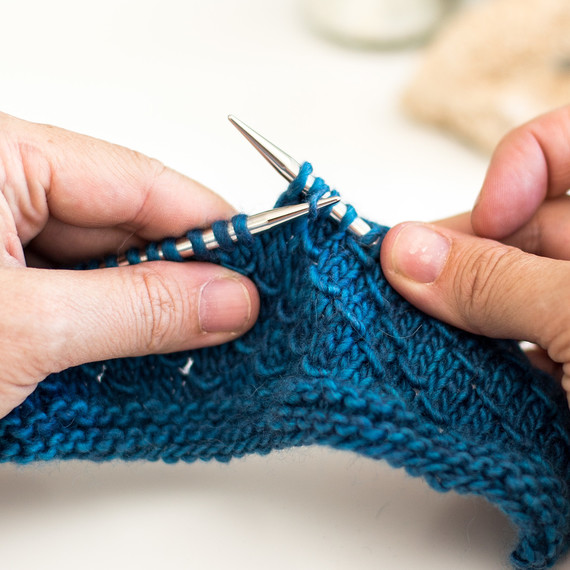
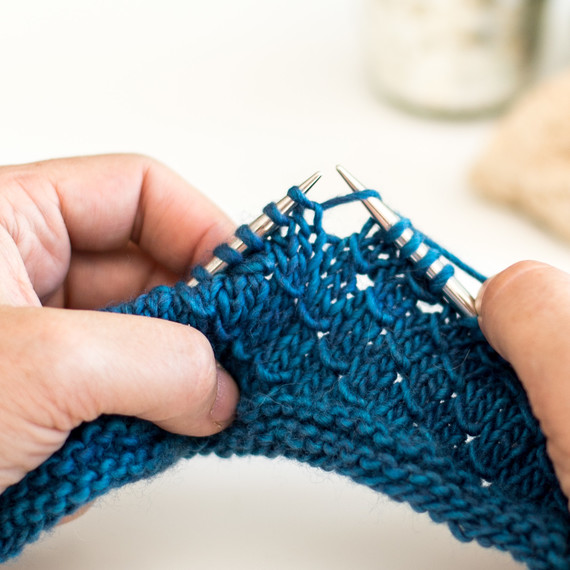
Pick up the made stitch, and…
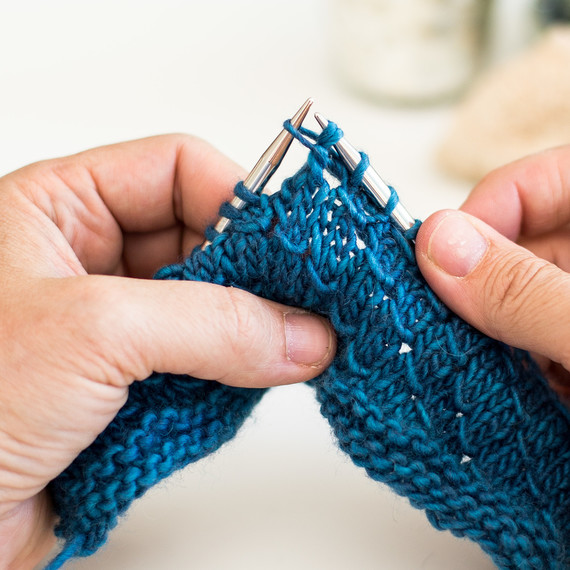
…pull it over the two knit stitches you just completed. Repeat until the end of the row.
Purl the third row. On the fourth row, do the same as above but shift the pattern two stitches. Repeat these four rows for the pattern.
For other new knitting stitches, explore Anne Weil’s profile. This would be a fun pattern to turn into a lace shawl.
SOURCE:http://www.marthastewart.com/1500404/lacy-diagonal-scallop-stitch