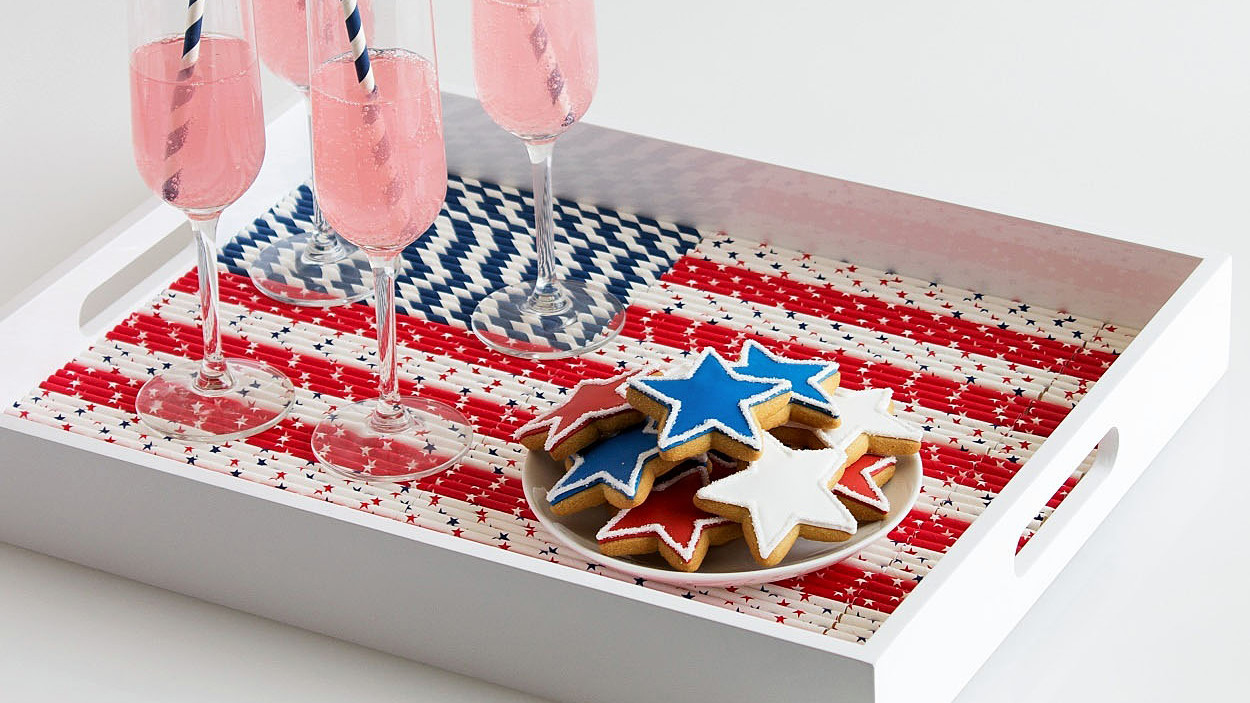
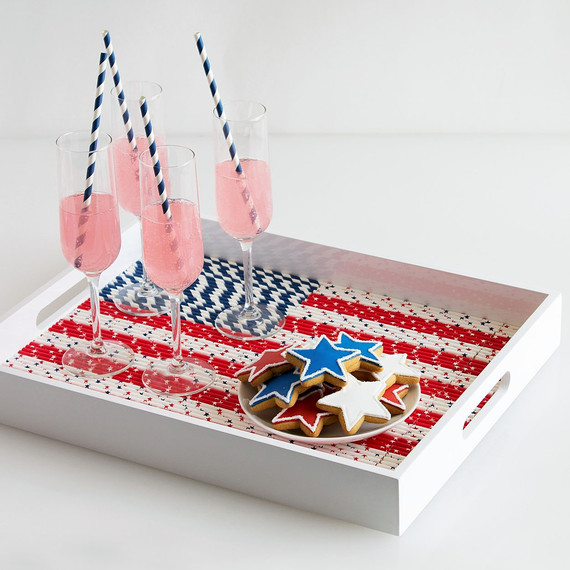
The Fourth of July isn’t just a day to show national pride. It’s also one of the biggest BBQ and party days of the year! Gather friends and family together for plenty of grilled goodies, potato salad, watermelon (tequila optional), and other seasonal summer staples, and serve them up on this DIY tray. With a combination of basic household materials and a few easy steps that anyone can accomplish, you’ll be impressing guests with a cool decorated tray that only took minutes to make.
All you need is a blank tray (which you may already own or is otherwise inexpensive to buy), a few packages of paper straws, double-sided tape, paper, and your imagination. We decided to give the classic USA flag a modern makeover for our tray. But you can use your red, white, and blue straws to create any pattern that you prefer. Not hosting a Fourth of July party? From a summer birthday to a pool party, this DIY can easily be translated to work with any summer celebration’s color scheme. Plus, after the fun is over the straws come right off the tray, so you can create an entirely new look for your next hosted event.
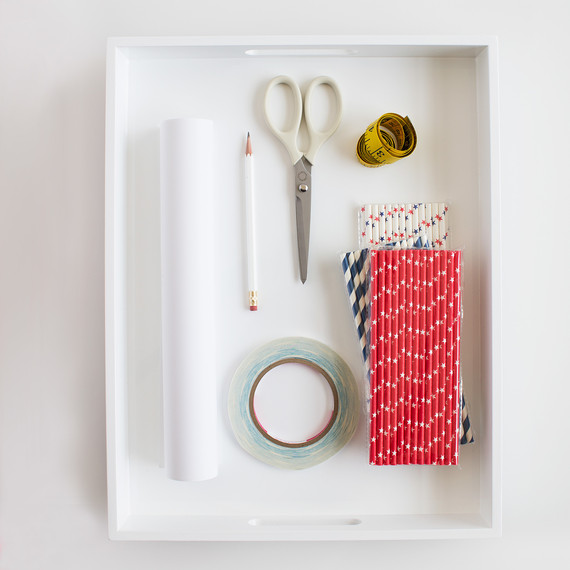
Materials
- A tray (ours is from West Elm)
- Red, white and blue paper straws, available all over (we got ours at Amazon)
- Scissors
- Double stick tape (we like scor-tape)
- Measuring tape
- Pencil
- Paper

Step 1
Measure and cut a piece of paper to sit in the bottom of the tray. It’s okay if you need to tape or paste a couple smaller sheets together to fit the size of your tray.

Step 2
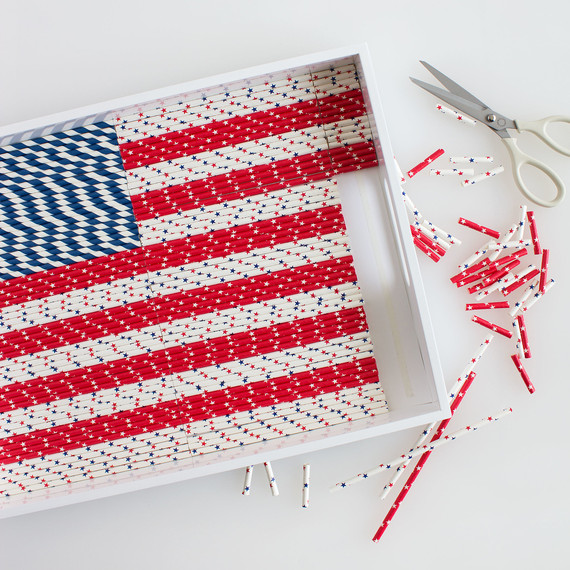
Set the paper aside and map out how you’d like to arrange your straws. You can do a classic flag motif like we did or any pattern that suits your style or party theme. We love the idea of creating a checkerboard pattern or creating large stripes.
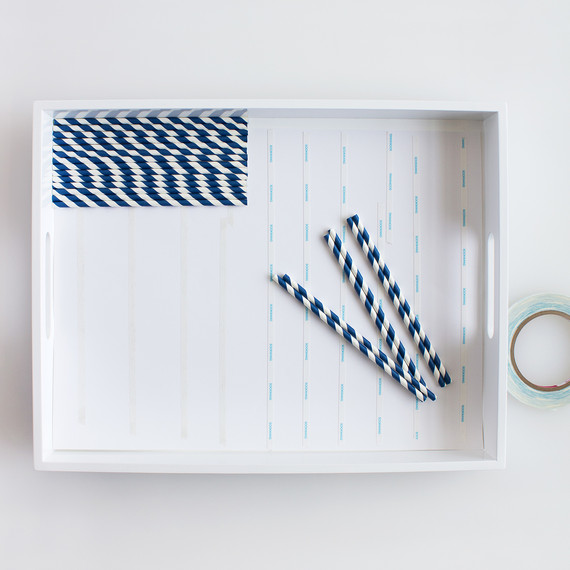
Step 3
Once you are happy with your design, make a note of it or snap a photo with your phone for later reference. (This will be handy as you work.) Place the paper into the tray before adding multiple lines of double stick tape about every two inches. Next, remove the protective paper off the tape only under where you’ll begin placing the first row of straws.
Step 4
Continue completing the application process of the straws, removing the protective paper from the tape as you go. Make sure the straws are secure by gently pressing them into the tape. If you need to cut any straws to full the edges of your tray, go ahead.
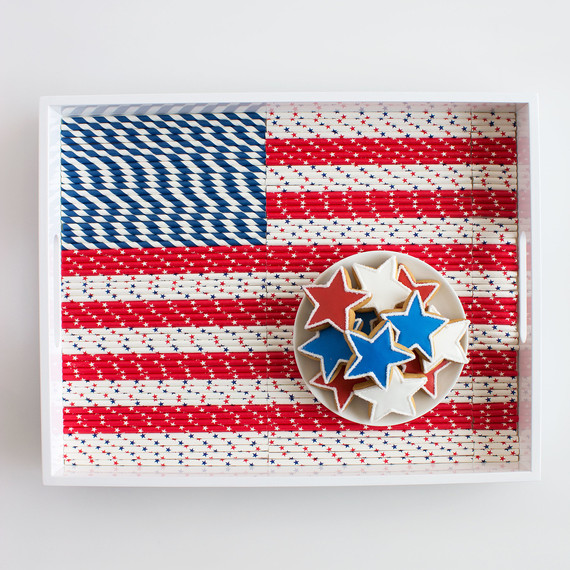
You’re done! All that’s left is serving your tasty treats on this clever nod to the stars and stripes. And after the party you can remove the straws and paper, leaving the tray like new to be used again plain or decked with different straws for a completely different look!
SOURCE:http://www.marthastewart.com/1503414/diy-serving-tray-party-accessory-fourth-july