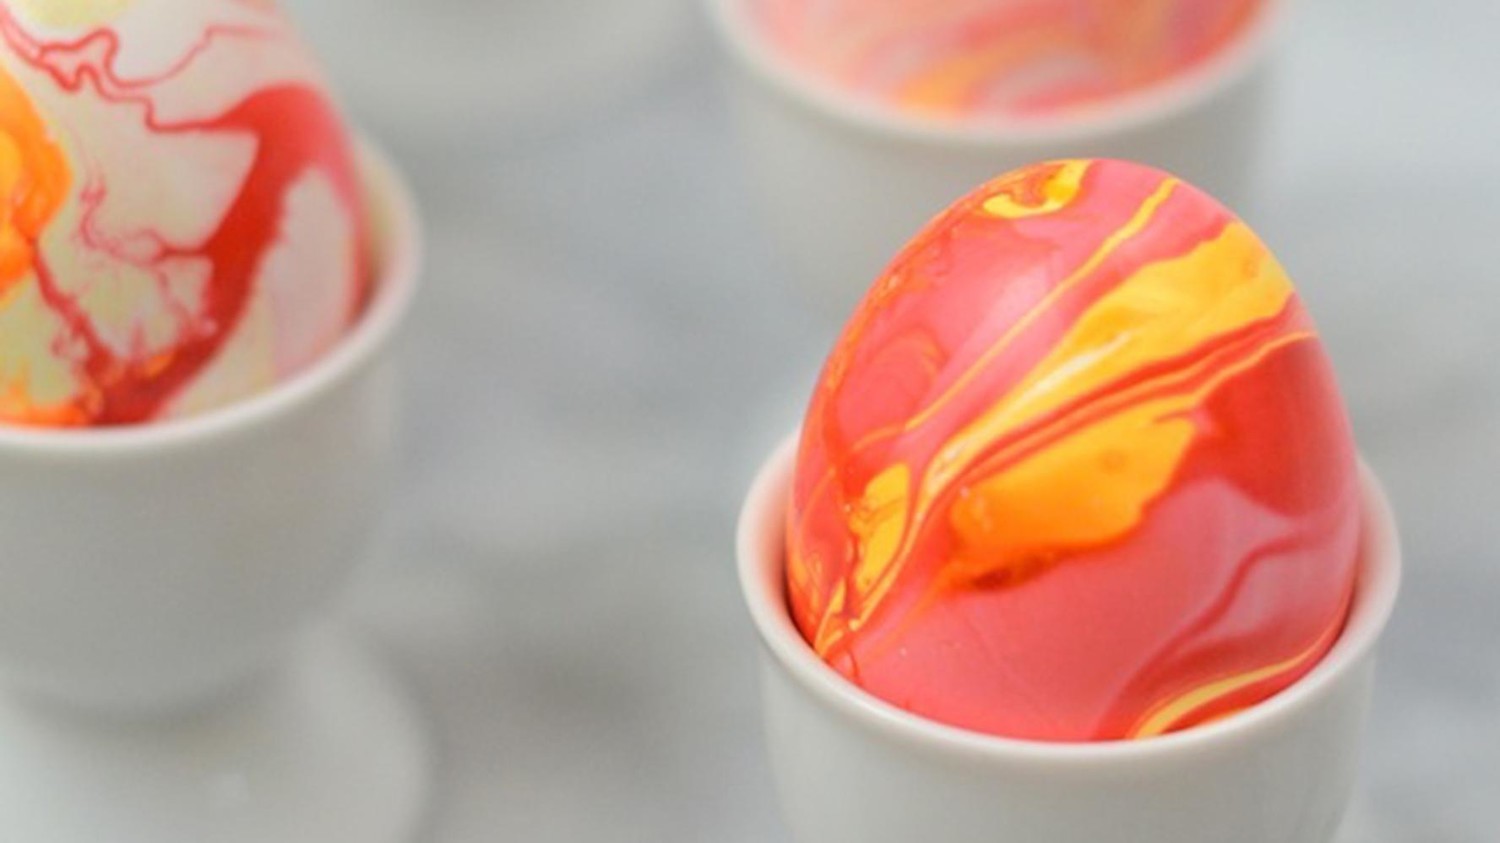
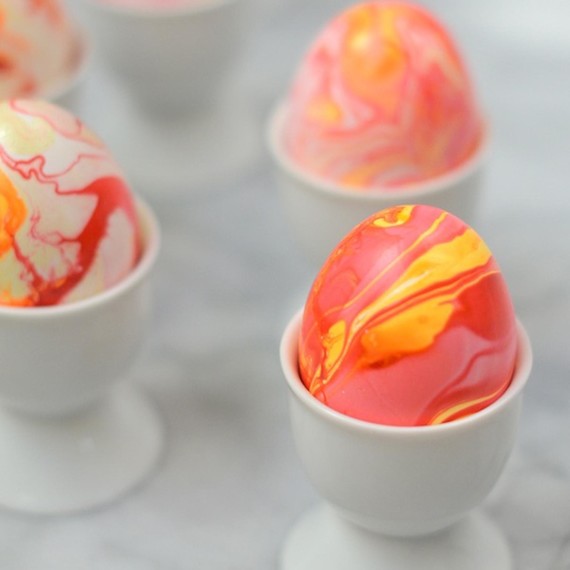
When I sat down to brainstorm ideas for my upcoming Easter table, I thought about how the vivid shades of some of my favorite spring nail polish shades would be perfect for marbling Easter eggs…and didn’t they turn out pretty? Making these is rather addictive: I couldn’t stop playing around with different color combinations and dipping just about everything in sight into the swirly waters. But the most fun part was seeing how each egg turned out completely different. Follow the instructions below to create your own, and be sure to pair them with these cute egg holder place cards to create the perfect Easter table.
Materials:
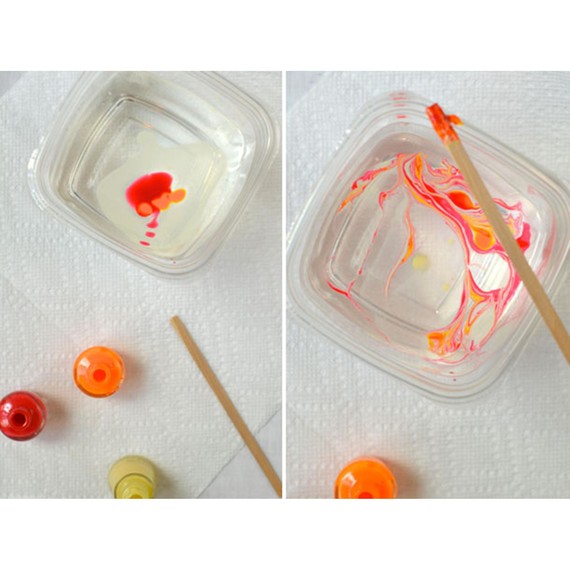
-Nail polish in a few different shades
-Medium-size Tupperware, filled with cold water
-Slottted spoon
-Wooden skewer
-Eggs prepped for decorating
Directions:
1. Pour a few drops of each nail polish color onto the water surface. Be sure to experiment with this step as the order you pour the colors results in varying marbleization.
2. Use a stick to swirl the nail polish around.
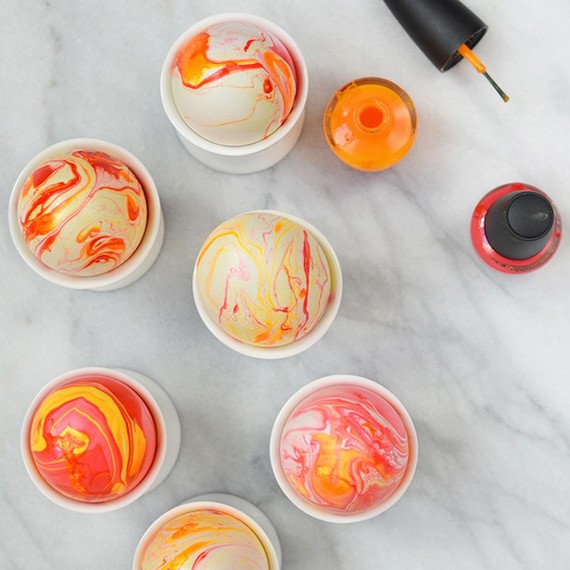
3. Carefully submerge the drained egg into the water until completely covered, then quickly pull out with a slotted spoon.
4. Set egg aside to dry. Scoop out nail polish from water surface between eggs.
5. Repeat steps 1-4 for each egg.
Tip: Create an egg-drying rack like the one pictured by poking T-pins through a thick foam board about 1.5 inches apart.
Your eggs are ready! Be sure to let them dry thoroughly before handling. Happy Easter!
SOURCE:http://www.marthastewart.com/1106234/easter-decorating-ideas-marbleized-eggs