For a lot of parents, Valentine’s Day means construction paper hearts and an onslaught of licensed characters. Why not make valentines at home instead? Most valentine DIYs for kids require a lot of cutting, which can be frustrating for my 5-year-olds — especially if I’m asking them to make 20 valentines for classmates. For this craft, I focused on craft processes they really like: finger-painting, rubber-stamping, and stickers. These valentines also self-close, so there’s no need for an envelope.
Materials:
- 11-by-17-inch pieces of white card stock (each sheet will yield 3 valentines)
- Waxed paper or parchment paper
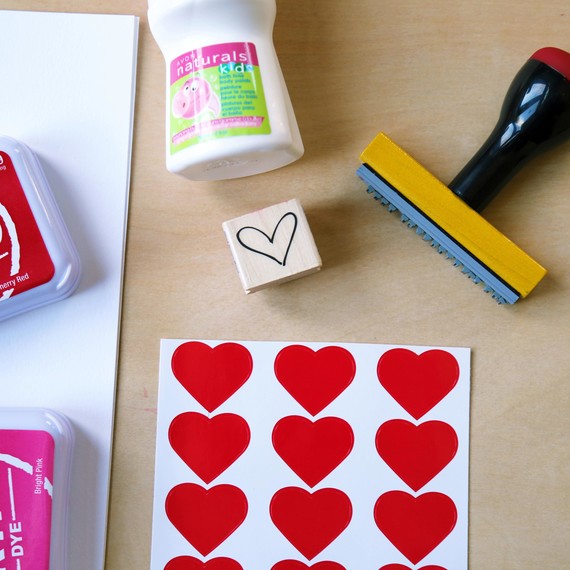
- Kids bath-time body paints (such as Avon’s Naturals in Bouncing Bubble Gum)
- Paper plate
- Plastic spoon
- X and O cookie cutters
- Paper cutter or scissors
- Ruler
- Pencil
- Valentine’s Day rubber stamps
- Stamp pad ink in pink and red
- Scented markers
- Heart stickers
Directions:
Step 1:
Wet both sides of the card stock under the faucet. Paper can become fragile when wet so I put each sheet of wet card stock on a piece of waxed paper. By gripping the waxed paper, I was able to transport the wet paper to our work space. Repeat with other sheets of card stock.
Step 2:
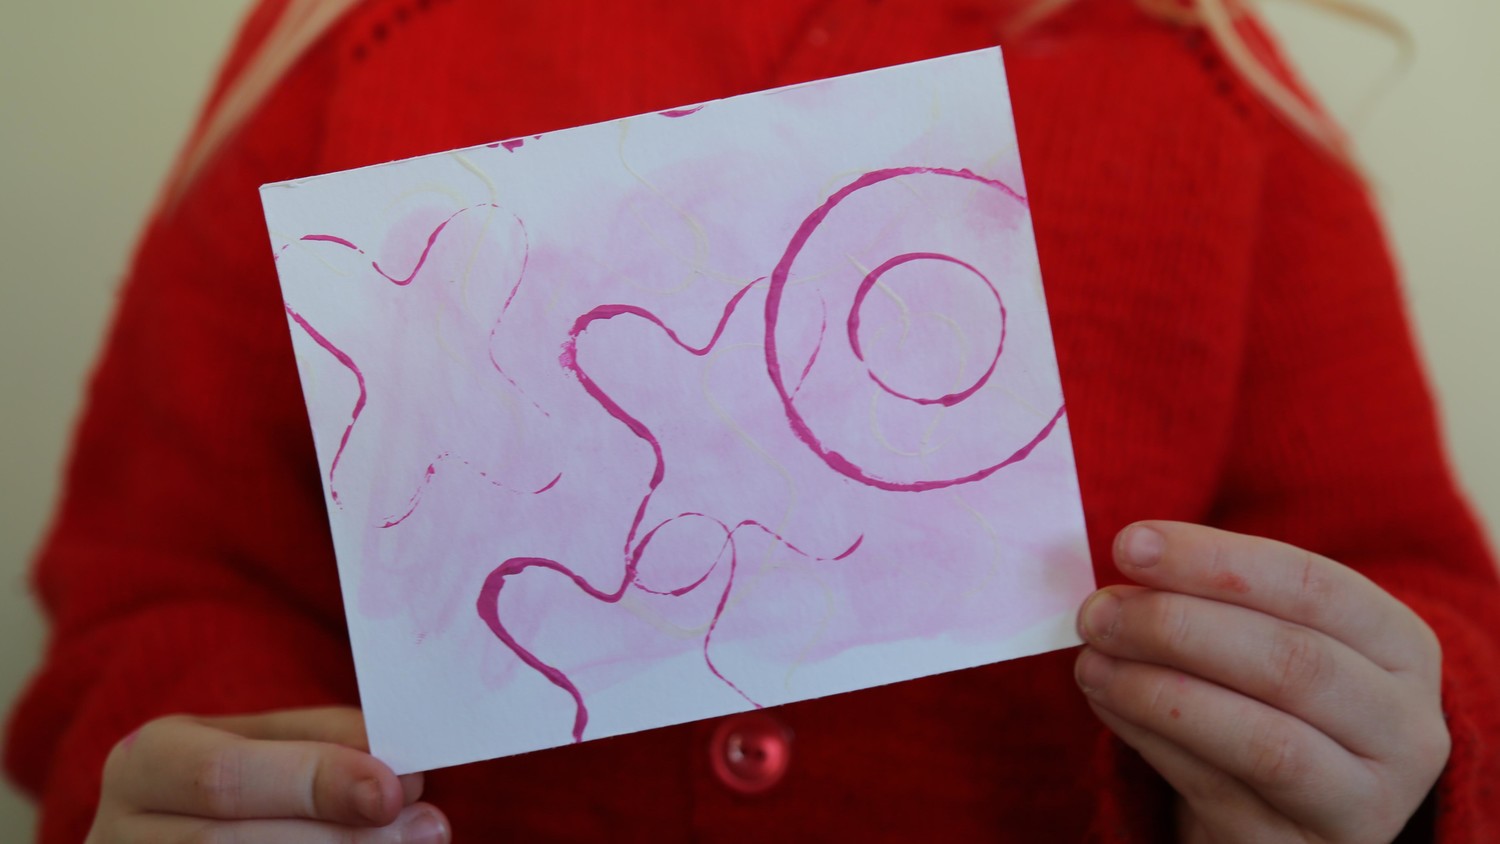
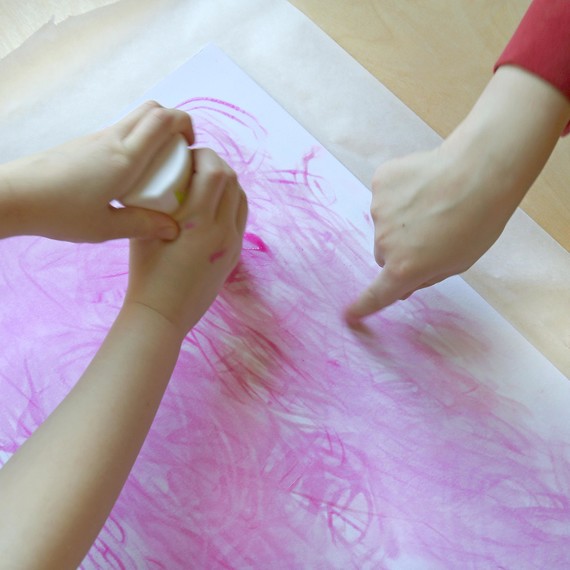
Let your kids go crazy finger-painting with the body paints. The body paints lighten as they dry, so use them generously for the most impact. If your children really saturate the paper, the paint will color both sides of the paper, which is a lovely effect.
Step 3:
Dry finger-painted card stock completely, about 8 hours.
Step 4:
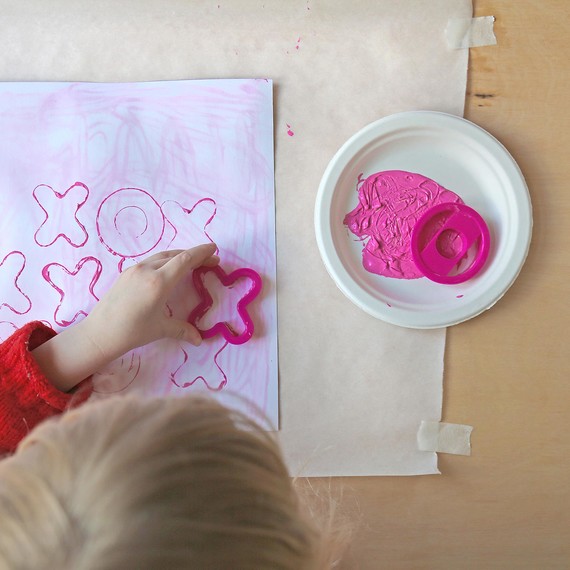
Optional: Smooth a thin layer of paint on the paper plate using the spoon. Dip the cookie cutters in the paint and apply to the sheet of paper. Let dry completely.
Step 5:
This step needs to be done by an adult, preferably without the kids nearby, as it requires cutting, math, and a little concentration. Cut each piece of cardstock into three 10-by-5-inch valentines. Score each valentine and fold into thirds.
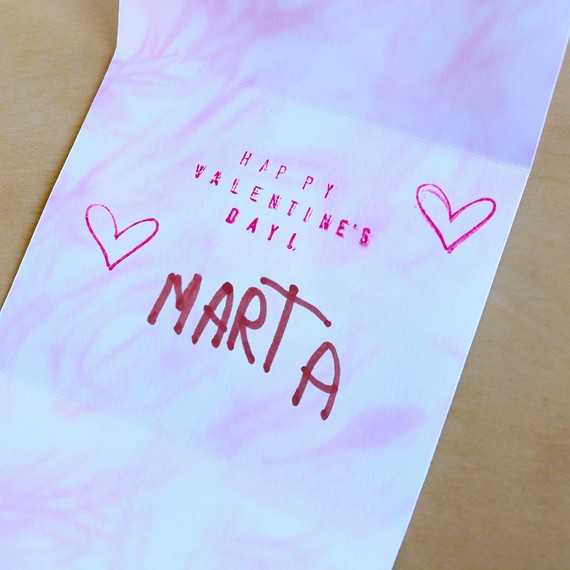
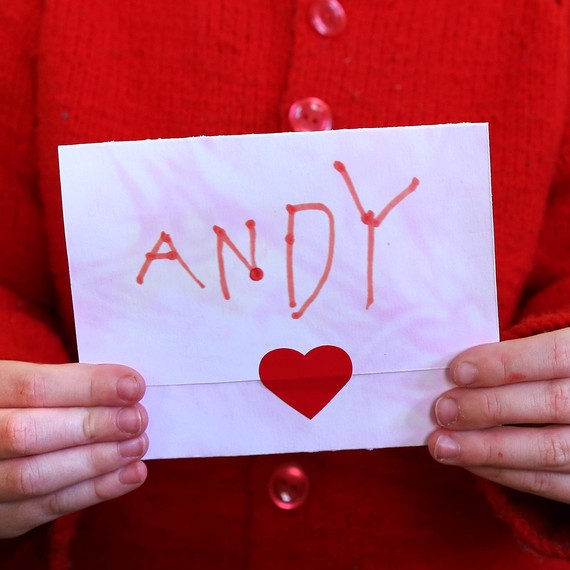
Step 6:
Have your kids rubber stamp the inside of the valentine with a greeting and decorate as they wish. Drawings with scented markers, stickers, more stamps, whatever! I have a make-your-own rubber stamp kit, so we used that for “Happy Valentine’s Day” and left plenty of space to write a name.
Step 7:
Seal with a heart sticker and address the outside of the valentine.
My kids love the way these valentines smell and even used scented markers to address them. Let me know what your kids think. Have you found craft inspiration in unusual places … like the bathtub? Who would have thought, right?
SOURCE:http://www.marthastewart.com/1100727/kid-craft-valentines-day-cards