
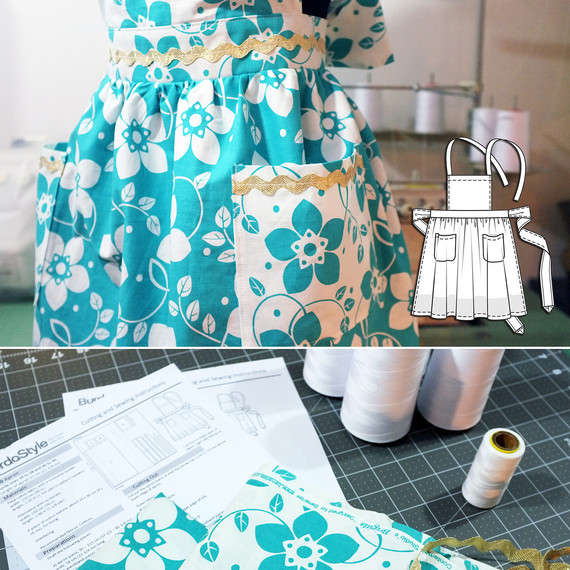
I made this apron for my friend and her kitchen is teal and white with gold accents, so I transformed some printed cotton and gold rick rack into a special apron I made just for her. I have made several aprons from this sewing pattern since, and I love the way they have all turned out. I used BurdaStyle’s draft-it-yourself apron pattern that you can download here. It is nice that this particular apron pattern is draft-it-yourself so you can implement the piece measurements right on the fabric so you don’t wast any paper!
Materials
Apron pattern (piece measurements included in PDF instruction download)
2 yards of printed cotton (in two different color ways, 1 yd of each)
3 yards of gold trim (rick rack)
1/2 yard of fusible interfacing
Scissors
Fabric pen
Ruler
Measuring tape
Sewing thread
Stock Everything You Need in This Ultimate Sewing Basket
Step 1
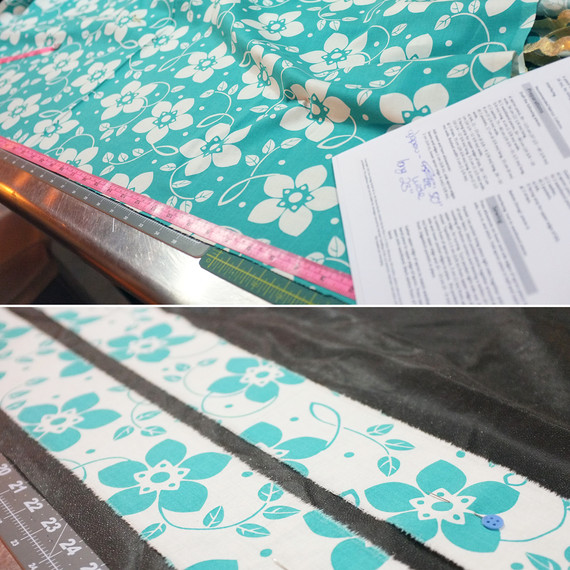
First, I prewashed the fabric and cut out all of the pieces as per my size indicated within the instructions; I also interfaced both of the waistband pieces.
Step 2
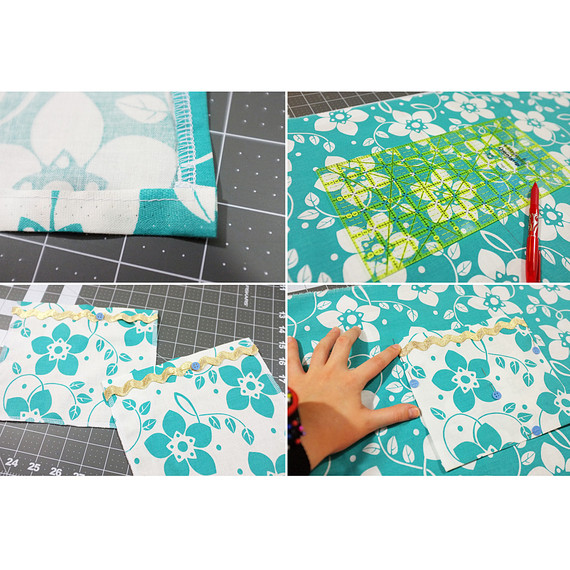
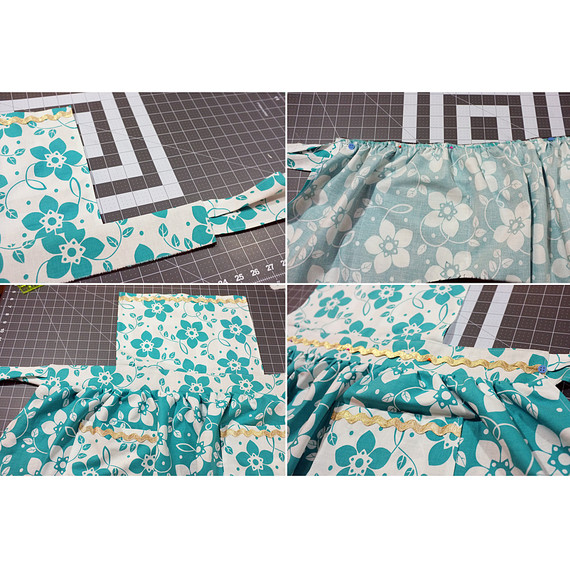
Next, sew the pockets. Before I attached the pockets, I serged the side edges of the main skirt piece (this prevents unraveling) and pressed the allowances of the side and hem edges to topstitch in place. Then, I prepared the pockets by pressing down the top edge and attaching some trim. Then, I serged around the edges and pressed the allowances inward. To mark the pockets, I used my clear gridded ruler and fabric marking pen, then pinned and stitched the pockets in place. This process completes the skirt portion of the apron.
Step 3
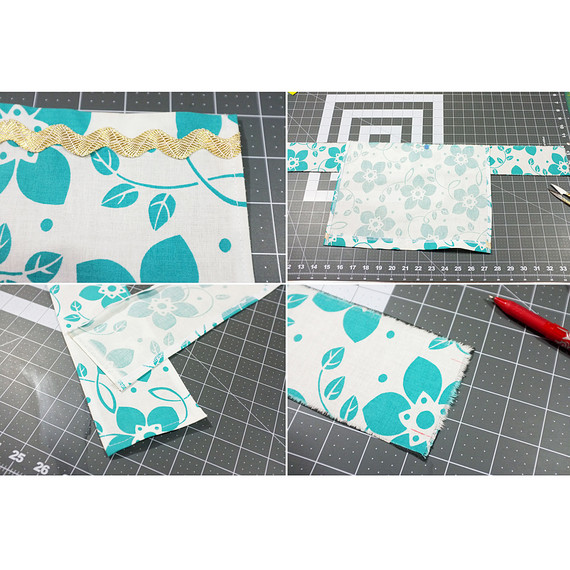
Now, move on to the bodice. On the front bodice section, I pressed down 1″ and topstiched trim along the top. I finished the side edges of the bodice piece by pressing in 3/8″ and sewing down in place. I located the center of my bodice piece as well as one of my waistband pieces and pinned them together at that point. I went on to complete my tie pieces that get sewn to the side edges of my waistband, and sandwiched in along with my bodice. In order to sew the tie pieces on correctly, I first had to mark their position on the waistband. I marked in 3/8″ from both the top and the bottom with my fabric marker.
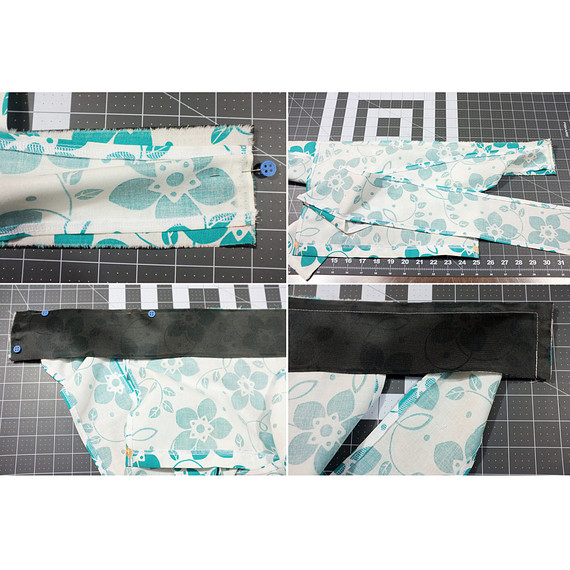
Step 4
I pinned the back tie pieces inside the markings on the side waistband to create a pleat. I stitched the pleat down in place within the seam allowance to make sure it was secure before I attached the other waistband piece. I then placed the other waistband piece, right side facing down, and pinned along the top and side edges. I started sewing at the bottom edge and pivoted at the corners. I graded the seam allowance and clipped the corners to reduce bulk before flipping the bodice right side out.
Step 5
Now that the top portion is complete, put the two pieces together! To do this, I stitched two rows of basting stitches along the top edge of the skirt piece and gathered until it reached the same width of the bottom of the waistband. I located the centers of both the waistband and the skirt piece to make sure the gathering was even. After I sewed the skirt to the waistband, I sewed some trim right along the middle of the waistband.
Step 6
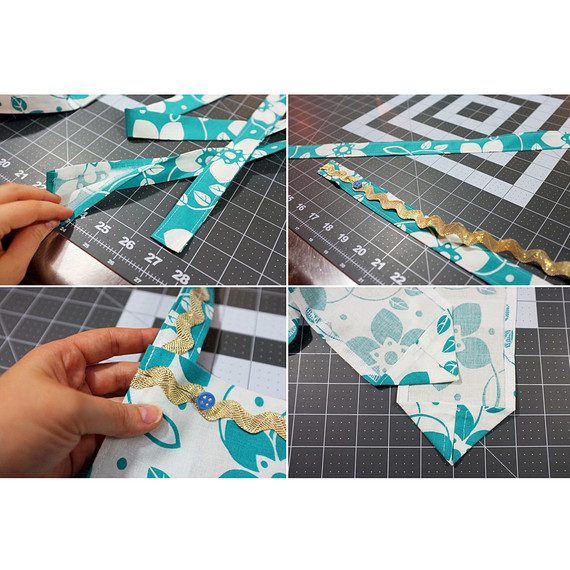
The last thing to do is to sew the straps. I pressed the raw edges in towards the underside of the printed fabric and topstiched around the entire perimeter. For added flair, I stitched some extra gold trim to the center of the strap. I positioned the strap to align with the side top edge of the bodice piece, and I stitched in place along the existing topstitching of the bodice (this makes the stitching less noticeable). Lastly, I pressed in the edges of the back tie pieces and handstitched a few in place to keep them together; this also creates a pleasant look point.
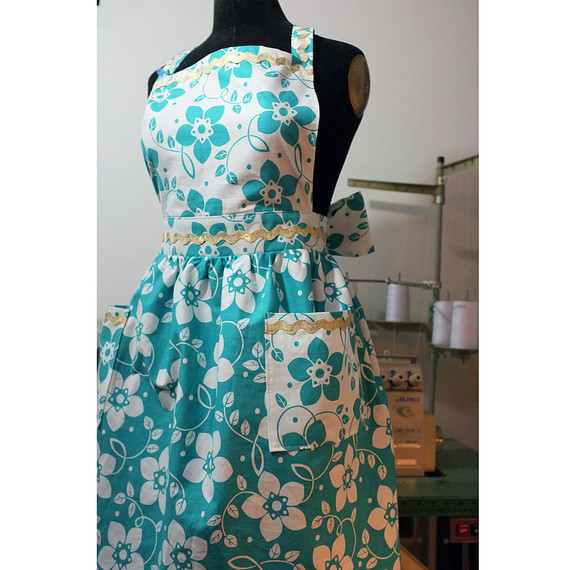
At last, the finished apron! I love the gathered skirt along with the pleated ties. You can get really creative when you make your own apron, and panel together different fabrics along with adding your own trims. You can also sew up your own matching oven mitt using this pattern and make child (aka kitchen helper) a matching apron!
Looking for some other apron styles? Try making an Apron Skirt, a Leather Work Apron, or a Gardening Apron. Happy sewing!
SOURCE:http://www.marthastewart.com/1503590/how-to-sew-vintage-inspired-apron