
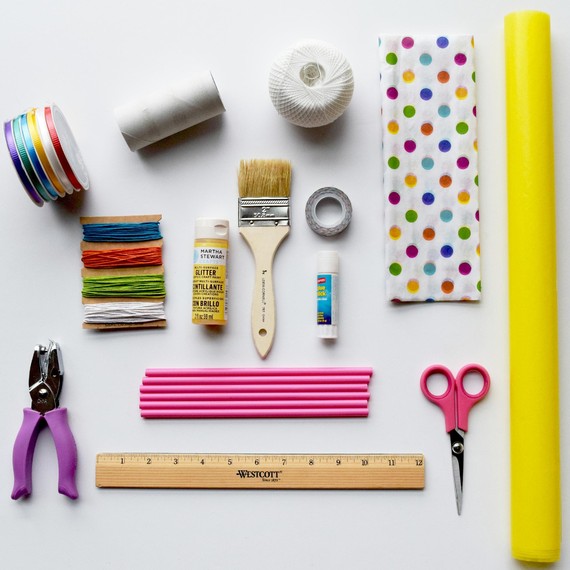
Materials
– Martha Stewart Multi-Surface Glitter Acrylic Craft Paint in Lemon Drop
– 1 toilet paper tube
– 6 medium-width, sturdy straws
– 3 yards of washi tape
– 3 1/2 yards of twine
-1 sheet of decorative tissue paper (20″ x 30″)
– 1 sheet of kite paper (20″ x 30″)
– 30-60 feet of kite string
– Thin ribbon in assorted colors
Tools
– Paint brush (optional)
– Scissors
– 1/8″ circle hand punch
– Ruler
– Pencil
– Glue stick
Directions
1. Paint toilet paper tube with two coats, waiting 1 hour between coats.
2. Let dry completely before continuing below.
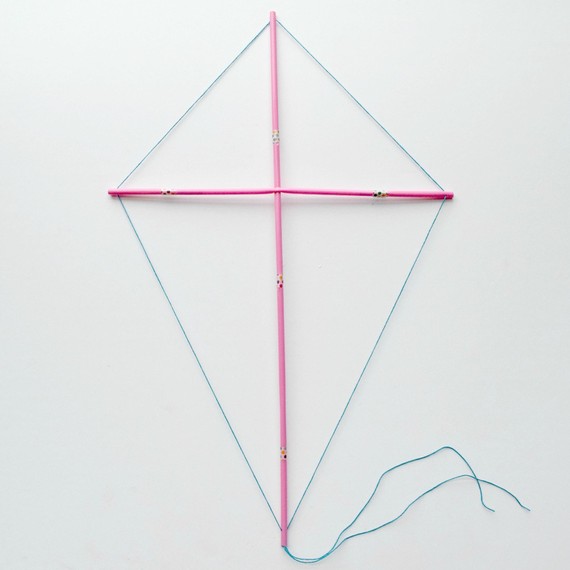
Assemble the Frame
1. Use the hand punch to create a hole through the middle of a straw. Use scissors to widen the hole slightly so that you can slide another straw through it make the cross section of the kite.
2. Insert straws into the top of the vertical piece by pushing one inside the other until it measures 10 inches from the middle of the cross. Cut straw piece(s) as needed to fit the measurement.
3. Insert straws into the bottom of the vertical piece until it measures 15 inches from the middle.
4. Insert straws into the left and right of the horizontal straw until each side measures 8 inches from the middle.
5. Secure each straw joint by wrapping tape around it.
6. Punch a hole through the sides of each end straw, about 1/4 inch in.
7. Starting at the top of the frame, thread about 2 yards of twine evenly through the holes on each side of the frame.
8. Pull the twine to make sure that it’s taut and tie a double knot at the bottom where the two sides of the frame meet. Do not cut the excess twine below the knot.
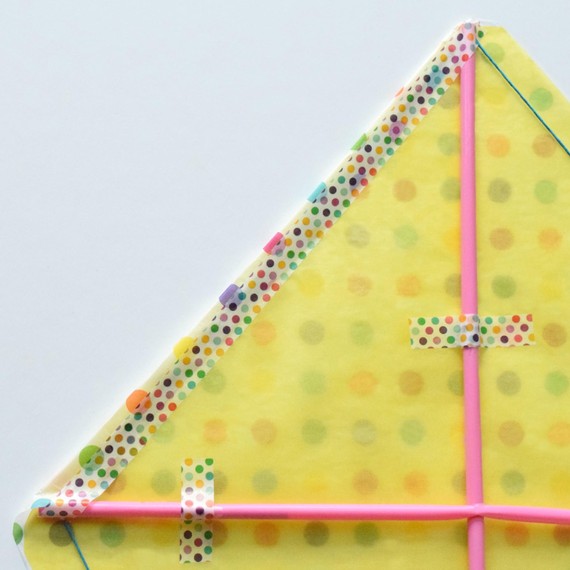
Create the Body
1. Lay the kite paper (shiny side down) on top of the tissue paper (decorative side down). Place the frame on top of the kite paper.
2. Use a ruler to draw a 1-inch seam allowance around the entire frame.
3. Remove the frame and follow the lines to cut the kite shape out of both papers.
4. Tape the frame to the kite paper at each straw joint.
5. Pick up the kite paper with the frame attached, turn it over and run the glue stick along the edges of the paper.
6. Place the kite paper and frame back on top of the tissue paper and press the edges down.
7. Fold each side of the kite over the frame and seal with tape.
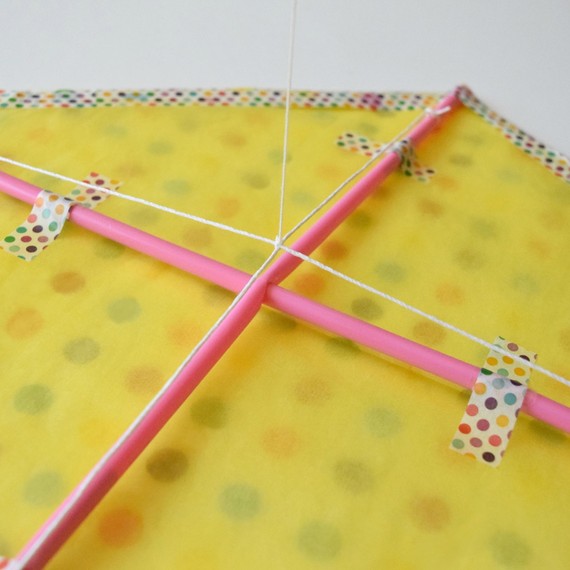
Attach the Strings and Tail
1. Punch holes through the sides of the straws at each end, approximately 2 inches in.
2. Thread 2 feet of twine through the top and bottom holes. Tie at both ends, allowing for slack.
3. Lift the vertical string; and underneath, thread 16 inches of twine through the left and right holes. Tie the horizontal string at both ends, again allowing for slack.
4. Lift both strings at the point of intersection and tie one end of the kite string in the middle to create a triangle.
5. Tape the other end of the kite string to the toilet paper tube and wrap the string around it several times.
6. Tie a few (4-5) ribbons to the excess twine at the bottom of the frame to create a tail.
You’re done! Enjoy flying this beauty and happy crafting!