
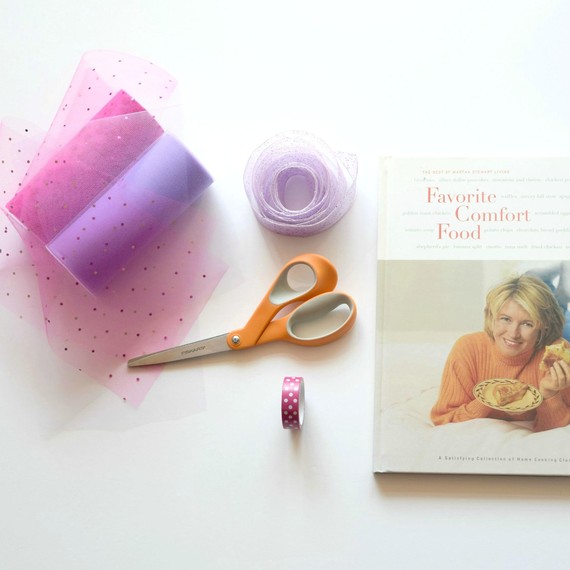
Materials
– 1 1/2-inch ribbon (yardage will depend on waist measurement; see below)
– 6-inch tulle spools in coordinating colors (2-3, depending on desired fullness)
– measuring tape
– scissors
– 1/4-inch-thick book or piece of cardboard with desired tutu length
– masking tape
First, you will need to take measurements to determine the length of your ribbons. Take your ballerina’s waist measurement and then add between 16 and 48 inches to give you enough length to make a bow. We wanted to make a pretty big bow in the back, so we used a total of almost 2 yards (waist measurement of 18 inches, plus 24 inches on each side for the bow). Next, starting at your ballerina’s waistline, take a measurement to determine how long you want the tutu to be. In our version, our desired length was 11 1/2 inches.

Directions
First, cut your materials:
1. Cut your ribbon to desired length as determined above and set it aside.
2. Going lengthwise, wrap a spool of tulle around the book/cardboard. Continue wrapping until the spool is empty.
3. Use scissors to cut along the top. Set the cut strips aside.
4. Repeat steps 2-4 for each color. We used one full spool of lavender and 1 1/2 spools of hot pink, which made it nice and full.
Then assemble:
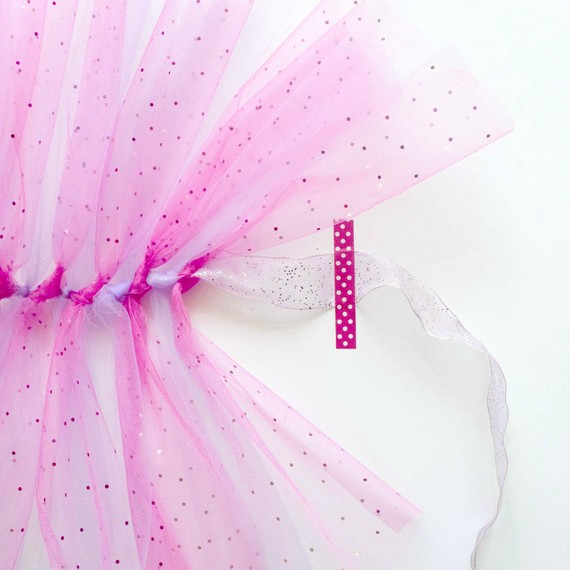
1. Lay the ribbon out on a flat surface and use two pieces of masking tape to mark where the waist measurement stops and where the extra length for the bow should begin on each side. Leave room under the ribbon so that you will have space to tie the tulle strips.
2. Starting at one side, lay a strip of tulle under the ribbon, then bring each end together to tie a loose knot in the middle along the ribbon. Do not tighten yet.
3. Repeat step 2 in alternating colors until you reach the other side of the ribbon.
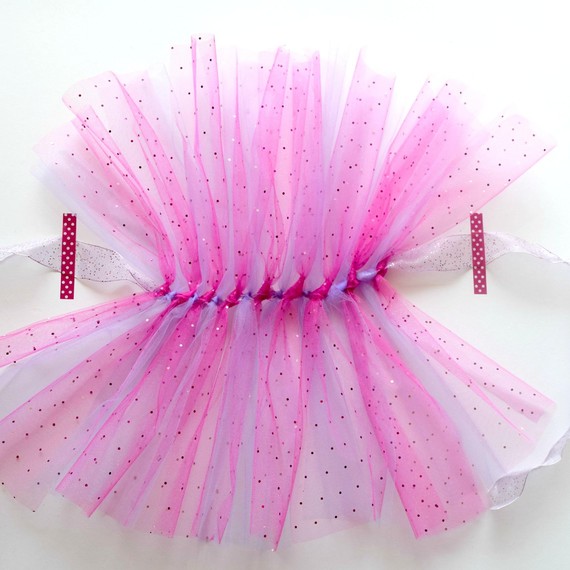
4. Slide the strips closely together. Add additional strips as necessary to reach desired fullness.
5. Fold each strip in half, over the knot and tighten.
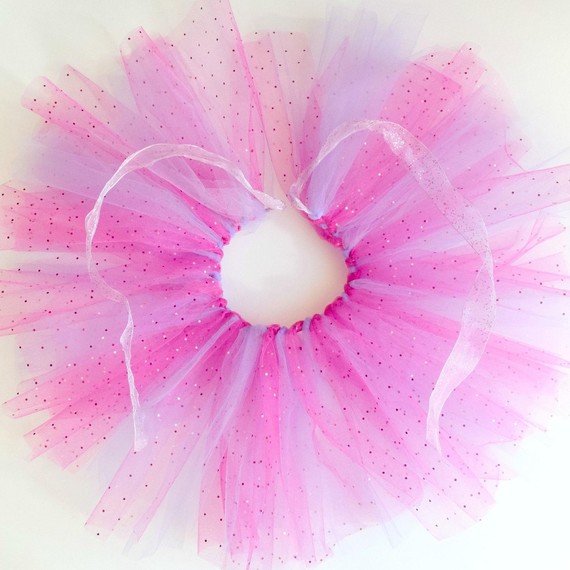
6. Remove masking tape and lift tutu to fluff as needed.
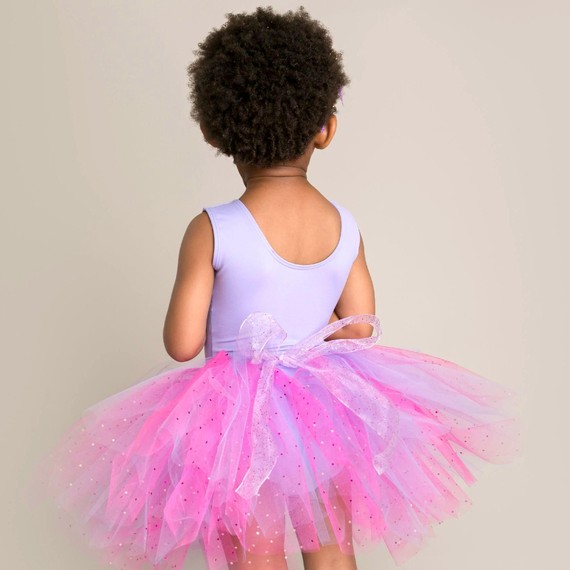
7. Place finished tutu around your ballerina’s waist and tie a bow in the back.
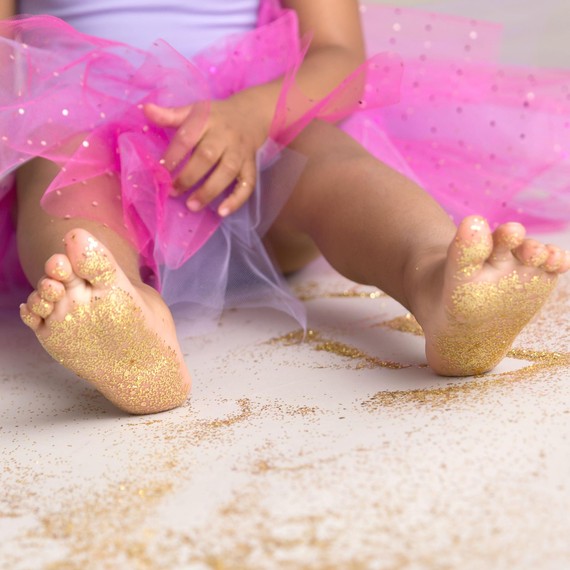
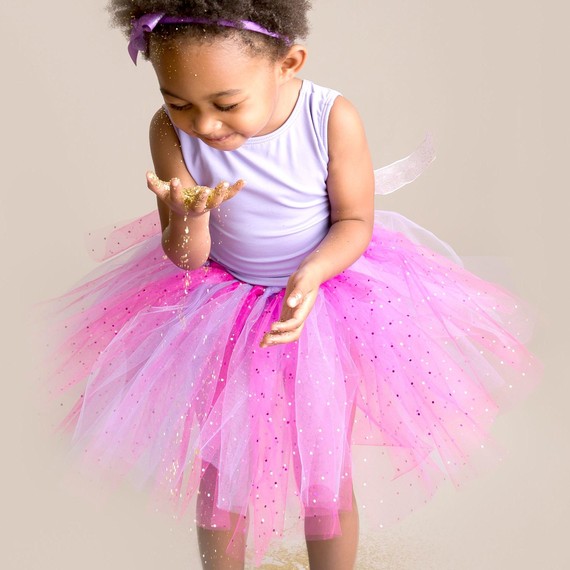
If you want to photograph just how cute your ballerina looks in her tutu (and I’m sure you will) you can get the look we achieved in these photos with a few helpful tips. Danielle Benson of Danielle Sara Photography recommends setting up your photo shoot near a window (so you have lots of natural light to work with) and removing any clutter from the background. A fun way to add an element of excitement when photographing your ballerina in her tutu is to add glittter, as shown. Confetti is a great option too! Both work best with kids ages 3 and up, and shot outdoors. “If you want to freeze action such as twirling and jumping, make sure that your shutter speed is set to at least 1/200, if not higher, to avoid blurry images or missing the action all together,” Benson adds. The most important thing: Let your little one’s personality shine through and have fun!
Watch the video below to learn how to stencil t-shirts with glitter!
SOURCE:http://www.marthastewart.com/1123622/how-make-dazzling-no-sew-tutu