
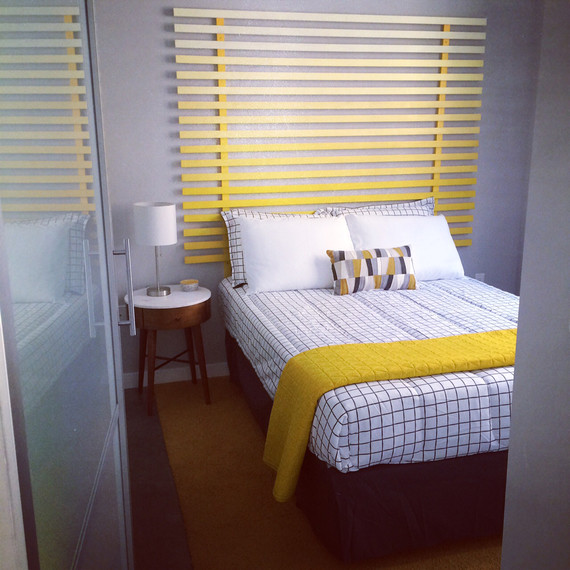
Good news: You can invest in a bed frame without an attached headboard — and you don’t have to sacrifice style in the process. This ombre DIY headboard proves just that — and will make a huge impact on your bedroom decor. It works best in bedrooms with a simple, neutral palette. In the room shown above, I decided to use a bright yellow to coordinate with the cool gray on the walls, but you can use any color you like.
You will need basic drill skills to complete this project, and I have found that installing this headboard is a breeze with a friend around to lend a hand.
Materials
- 21 2″x1″x 80″ wood slats — this size works well for a queen size bed, but you may need to adjust this measurement to best fit your room
- 1″ paint brush
- Six 8-oz. paint samples (each one shade lighter)
- Drill
- Forty 2″ Screws
- Level
- Ruler
- Pencil
- Large piece of cardboard/dropcloth
Directions
Step 1:
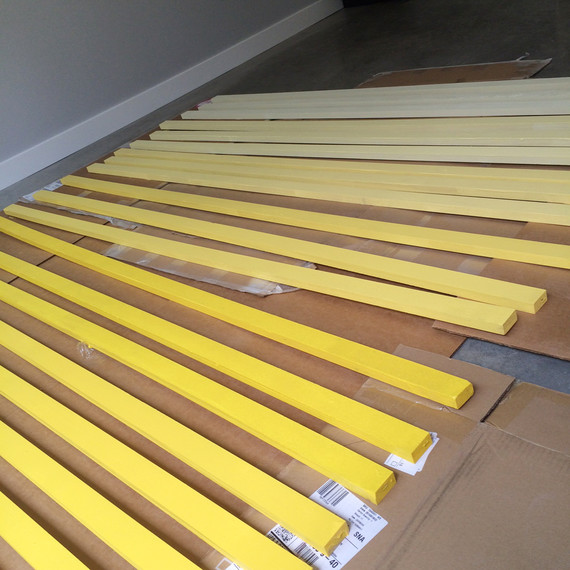
Lay out all of your wood slats on your drop cloth or cardboard.
Step 2:
Paint three wooden slats with each one of your paint samples. You should end up with 18 painted slats. To avoid confusion while you’re working, keep your samples arranged by shade — this will help you properly create the gradual ombre effect. Paint two more slats in the darkest shade you have. These two slats will serve as the vertical pieces that hold it all together. Leave your extra wood slat unpainted to be used as a spacer.
Step 3:
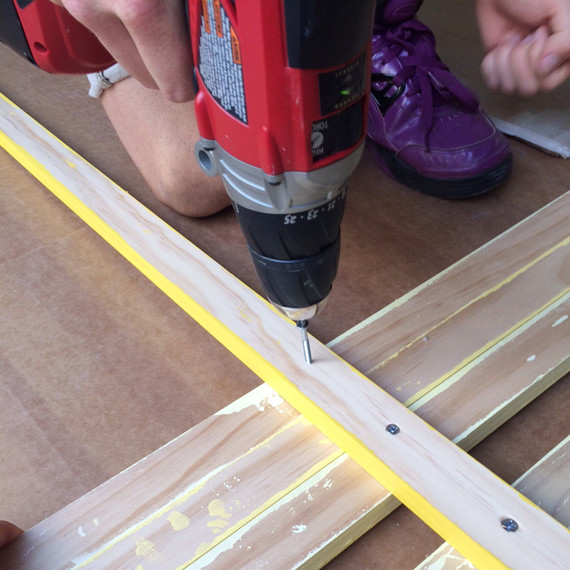
Wait for the slats to dry completely, then organize them in the correct order, going from lightest to darkest. (Keeping your slats organized during this project will help prevent you from making mistakes.) Take one of the lightest-colored slats and lay it paint-side down. Using a ruler, measure and mark 6″ on either side. Then, place the two vertical slats on top of the light-colored slat, meeting the tops with the edge and your marking. Secure each slat in place with a screw.
Step 4:
Continue with the rest of your slats, using the extra one as a spacer each time and securing the slats in place with a screw. It’s really important to keep the design straight and even to acheive a streamlined, professional look. This may seem obvious, but remember to keep the order from lightest to darkest!
Step 5:
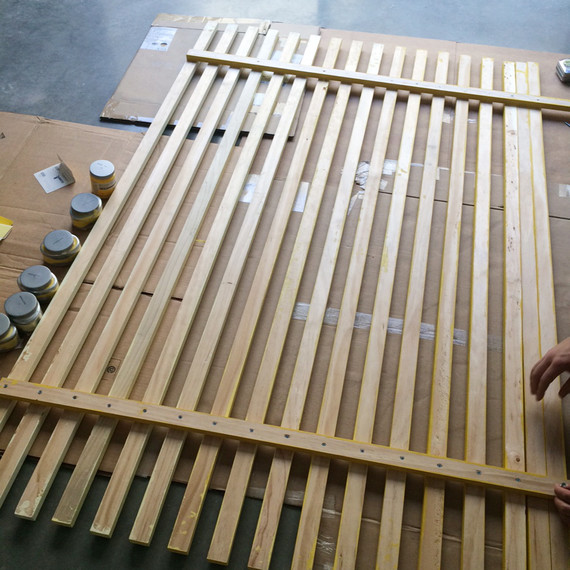
Keep going until all slats are connected. Then, flip your new DIY headboard over and admire your work! To secure your headboard to the wall, have a friend hold it in place so you place it correctly in your bedroom. Then, use a level and make marks on the wall to use as a guide and to ensure you install it straight. Counter sink the vertical slats in four places (two on top, two on the bottom) and attach the headboard to the wall with screws. This part’s important: Be sure to check that it’s level before you call it done (the “measure twice, attach once” rule comes into play here). As a finishing touch, paint over the screw holes with the coordinating paint.
SOURCE:http://www.marthastewart.com/1500396/diy-ombre-headboard