
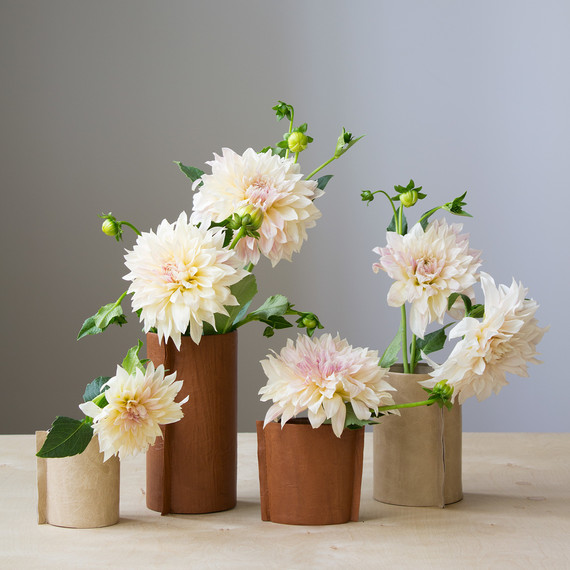
Fall brings with it cooler air, shorter days, and a sudden urge to update your surroundings. And this season, we’re loving the continuation of the rustic-meets-modern trend. We’re particularly enamored with adding leather accessories in small doses, like this DIY leather vase.
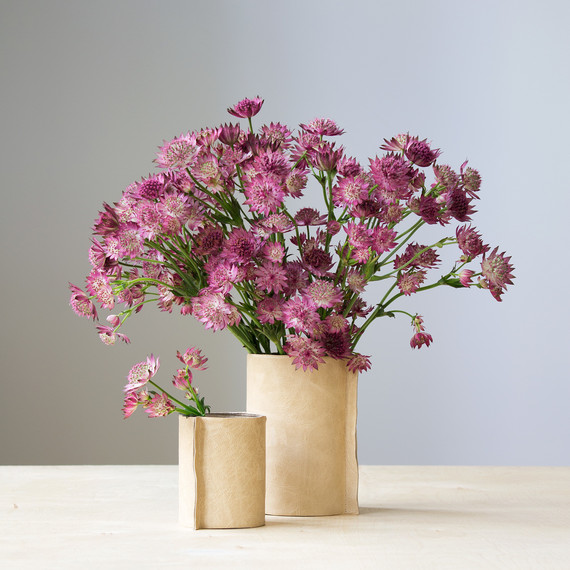
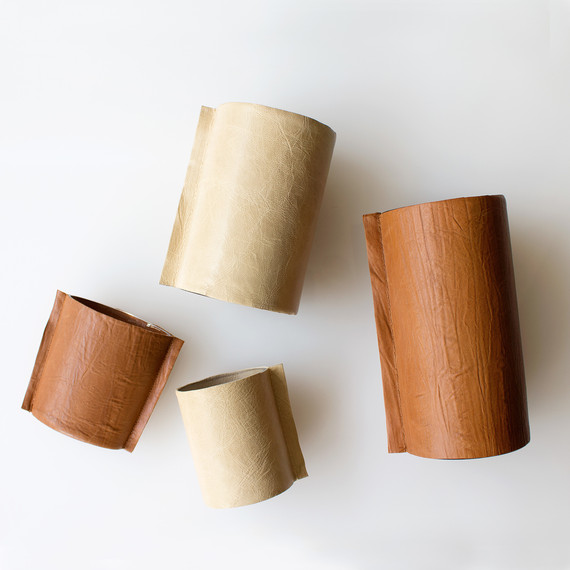
What we love about this project is that the warm, buttery leather easily updates a ubiquitous vase with a style that isn’t too masculine or feminine. The leather isn’t permanently affixed, so you can remove it whenever you want to change things up again. Plus, you can choose from a variety of shades, from natural brown and tan shades, to white, black, or even colored hues. They make a great everyday touch on your table, filled with a few stunning stems or even gorgeous grasses. Or create several of them to serve as unique centerpieces for your next dinner party.
27 Fall Centerpieces That are Perfectly Warm, Cozy, and Creative
Here’s the best part: This DIY only takes about 15 minutes (per vase) and the uncomplicated instructions means you just need to know how to sew a straight line. And there’s no need to buy a bunch of expensive leather either. Many fabric, craft, and leather stores sell scraps. We found ours in the scrap bin at Global Leathers in New York City. For another idea, try talking to a local upholstery business to source their unwanted scraps. Once you have your supplies, you’re only minutes away from adding a dose of fall style into your living space.
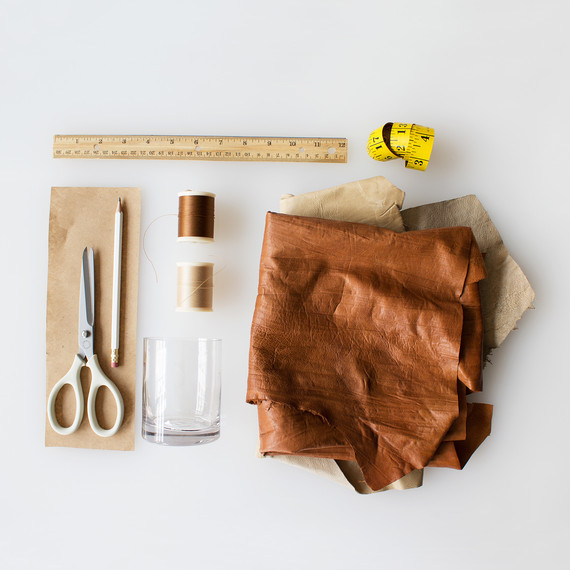
Materials
- Light to medium-weight leather (faux leather works too)
- Scissors
- Matching thread
- Sewing machine or hand-sewing supplies
- Straight-sided vase to cover (we used glass cylinders here, but other shapes will also work)
- Measuring tape
- Ruler
- Scrap paper
- Pencil
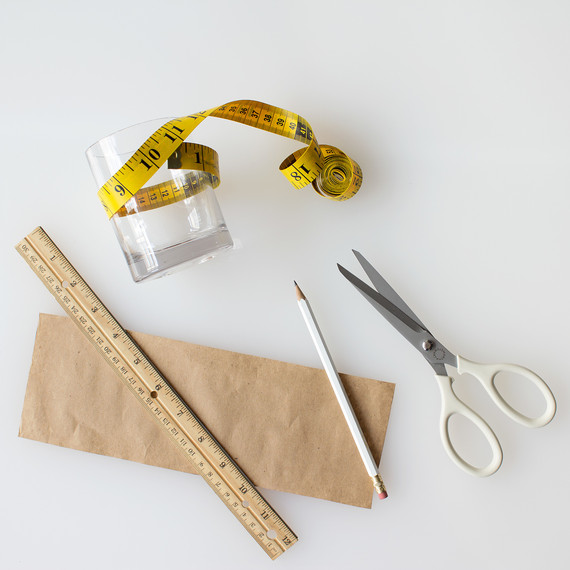
Step 1
Wrap your measuring tape around the vase and note the measurement. Based on these measurements, make a template, adding 1 inch to the length.

Step 2
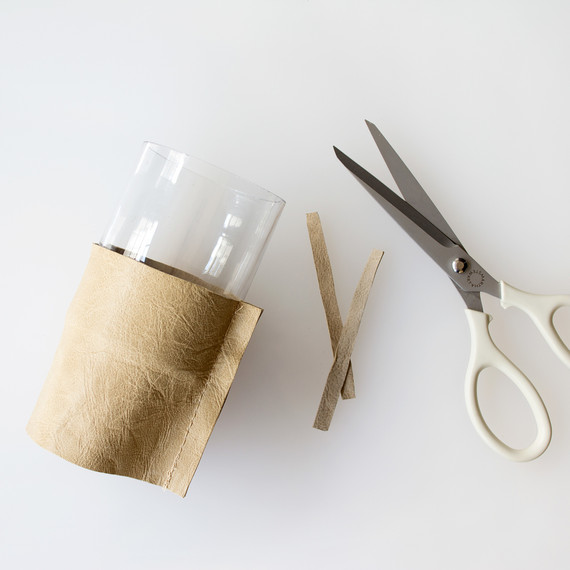
Using the template, trace and cut out your leather. Be especially careful to cleanly cut straight edges, as they will be seen.
Step 3
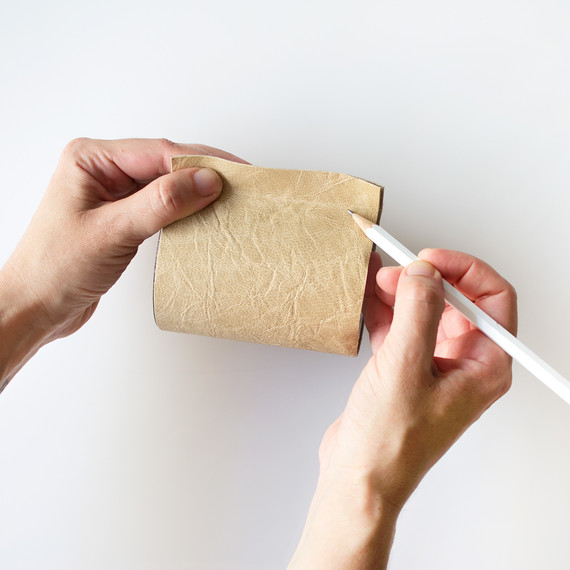
Check the fit and mark the leather where you’ll add the line of stitches.
Step 4
Stitch by hand or with your sewing machine before carefully slipping the leather cover over the glass vase. Trim any excess.
Here’s How to Easily Sew Leather by Hand
Your done! Feel free to arrange your favorite variety of flowers in this vase.
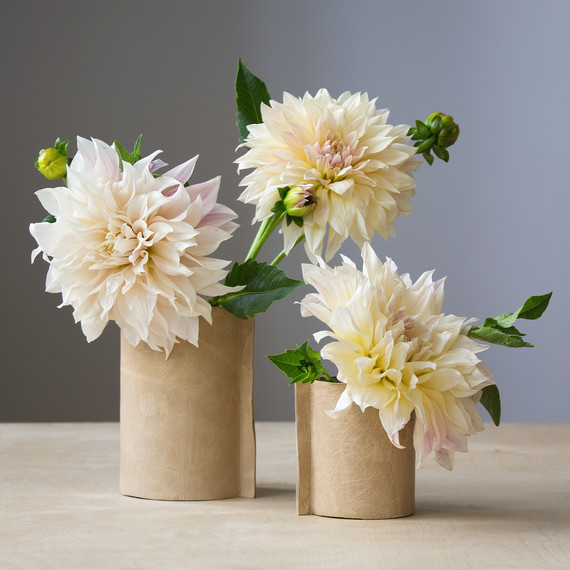
This warm accent piece brings life to any room of your home. Mix and match leather and flowers to see what combination you like best!
Here are 8 Fall Flower Arrangements We’re Loving Right Now
SOURCE:http://www.marthastewart.com/1505081/diy-leather-vase-you-can-make-15-minutes