
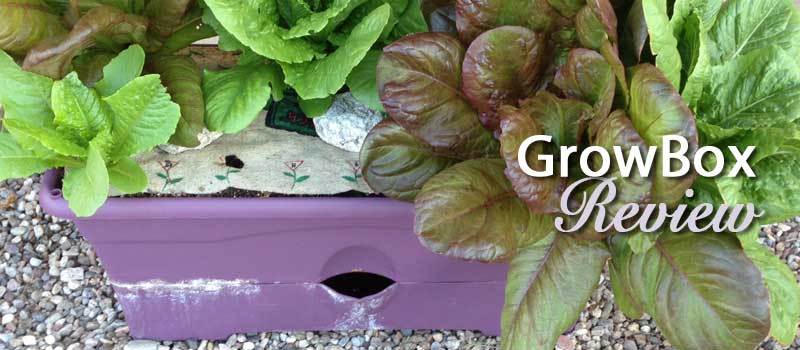
GrowBox self watering planters from Garden Patch have been around for a few years but they’ve recently introduced some new colors, including this fun eggplant color. So I thought it was time to try it out and see how it would work for growing greens in the harsh, sunny climate of Tucson.
Assembling the GrowBox
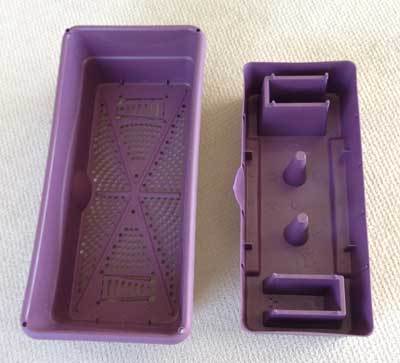
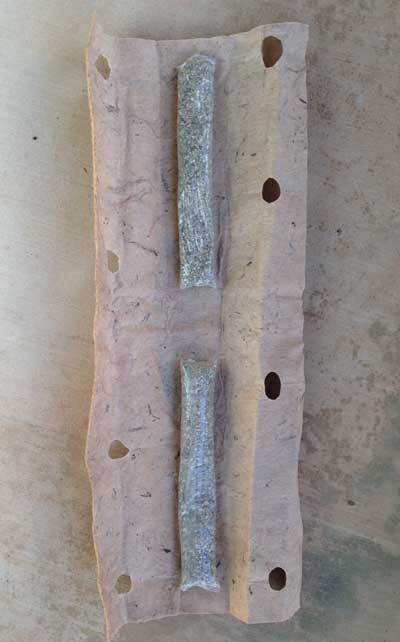
The planter (left) snaps onto the water reservoir (right). Note the pins and flaps in the bottom of the planter – those need to be separated from the surrounding plastic.
The GrowBox arrives in two pieces that you have to fit together, including the 4-gallon water reservoir and the planter, as well as a Nutrient Patch cover. Everything you need to grow plants comes packaged in one box, except for the growing medium (potting mix) and plants or seeds. The box also includes a sheet of very detailed assembly and planting instructions, complete with photos.
No tools are required to put the GrowBox together but you may want to have some sturdy scissors on hand to separate some of the plastic parts.
Be Careful and Go Slowly When Assembling
I found it difficult to remove the four pins (meant to secure the cover into the growing medium) from the bottom of the planter box to which they were attached. Be careful when you do this as the edges can be very sharp and I ended up cutting my finger on one of the pins.
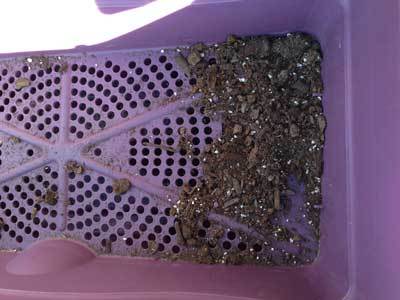
The hinged flaps in the bottom of the planter bend down to create a “wick” that you fill with potting mix.
It’s also difficult to bend the two hinged flaps into place in the bottom of the planter. These flaps, when pushed down, create a square hole into which you pack potting mix; this allows water to “wick” from the reservoir into the planter. Go slowly and don’t push too hard on the flaps or you’ll find that they don’t seat properly and you’ll have a hard time pulling them back into place.
The planter box fits easily onto the water reservoir that sits below it. Make sure you align the edges of the planter top and bottom before snapping the top onto the pins on the reservoir.
Size
Once assembled, the planter is just over 12 inches wide, 27 inches long and 11 inches tall. Somehow I expected it to be bigger… but you can still grow an awful lot in that small space.
Filling the GrowBox
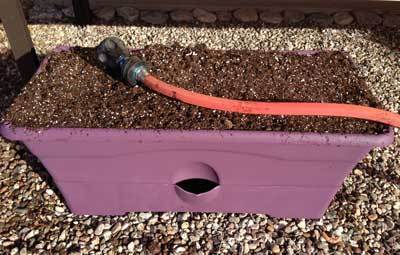
Be sure to water the potting mix thoroughly when the GrowBox is only half full. Then fill it all the way to the rim (or even above the edge) and water again.
Follow the instructions carefully to add the growing medium to the GrowBox. To ensure that the growing medium is nice and moist, the instructions ask you to fill the planter only halfway full with potting soil or growing medium, then fill it with water, and then put the rest of the growing medium on top before watering it again.
If there are dry patches or areas in the container, it won’t be able to adequately wick moisture from the reservoir up to the plant roots.
Growing in the GrowBox
The GrowBox is intended for intensive cropping, also called square-foot gardening (see our review of the Garden Stamp for another way to do this). The point is to grow as much as possible in as small a space as possible while minimizing the amount of work required.
To make that happen you need to provide ideal growing conditions to support a lot of plants. So the GrowBox comes with a special blend of fertilizers and nutrients and a cover that inhibits weed growth and retains moisture.
About the Nutrient Patch Cover
There are two fertilizer sleeves attached to the bottom of the Nutrient Patch. The sleeves dissolve on contact with water.
The cover is made from organic woven material and fits inside the top of the GrowBox (on top of the growing medium). Attached to the underside are two sleeves full of low-salt fertilizers and nutrients that are intended to provide just the right combination of elements to support rapid, strong and healthy plant growth. These fertilizer sleeves dissolve on contact with water so keep them dry until you’re ready to start growing.
Two Types of Nutrient Patch
There are two versions of the Nutrient Patch – one with a 9-14-15 blend of synthetic fertilizers (this is the original Nutrient Patch and the one used in this review) and one with an OMRI certified blend of fast-acting organic fertilizers that includes microorganisms that rapidly break down the materials and minerals into nutrients and trace elements that plants can then readily feed on.
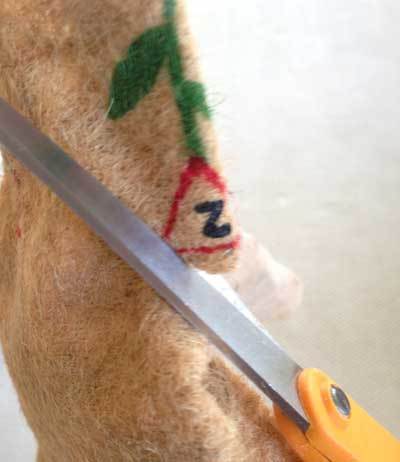
The Nutrient Patch cover is easy to cut with household scissors. Be sure to cut holes only as indicated by the instructions.
Replacing the Nutrient Patch
The company recommends that the Nutrient Patch be replaced each time you replant the GrowBox (the Nutrient Patch can be purchased separately online). That’s probably the easiest way to ensure good results but I’m going to reuse the cover as many times as possible to see how long it lasts and will use my own combination of organic and/or synthetic fertilizer and nutrients. I’ll update this review in the future to let you know how that turns out.
Planting the GrowBox
The Nutrient Patch cover is printed with planting instructions and has 18 spots marked on the surface to indicate the locations where plants should be placed. Take a good look at the included instruction sheet because it tells you exactly which spots to plant in depending on what variety of vegetable, herb or flower you’re growing.

A GrowBox all ready to plant!
I chose to grow romaine lettuce (a terrific and tasty blend of red and green romaine called Renee’s Caesar Duo from Renee’s Garden Seeds) so followed the instructions to cut out eight holes evenly spaced around the perimeter of the cover.
If you’re growing seeds you cut out a round hole so you can drop the seed(s) onto the growing medium below. If you’re growing plants then you would cut a slit from the edge of the cover to the spot indicated. That way you can slide the stem of the plant through the slit and dig the roots into the grow medium.
Plastic Pins Need Improvement
Once everything is in place, you’re supposed to use the plastic pins to fasten the cover to the growing medium below. I found that they didn’t stay in place. Any breeze got under the edges of the Nutrient Patch and blew it off the GrowBox. I ended up using a couple of stones to weight it down but landscape staples would probably have worked too. The pins just aren’t long enough to hold down the cover.
After two months in the GrowBox, the lettuce were ready to harvest. Big, strong, and tasty.
Watering the GrowBox
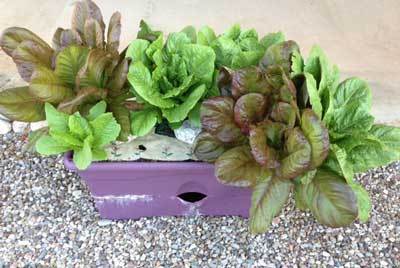
A bountiful harvest of romaine lettuce. Note the salt or mineral build-up between the planter and water reservoir.
Watering is easy. Just keep the water reservoir full (don’t water from the top). You don’t need to keep it topped up but don’t let it dry out completely. I tried filling it with a watering can, hose, and by placing the end of a drip irrigation line into the reservoir. All methods worked well.
One thing I noticed was an unsightly build-up of salts between the planter and the reservoir. That could be partially due to the high mineral content in our water here in Tucson, but also seemed to be from the fertilizer. It was difficult to remove, even with scrubbing.
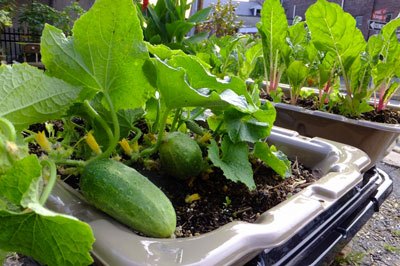
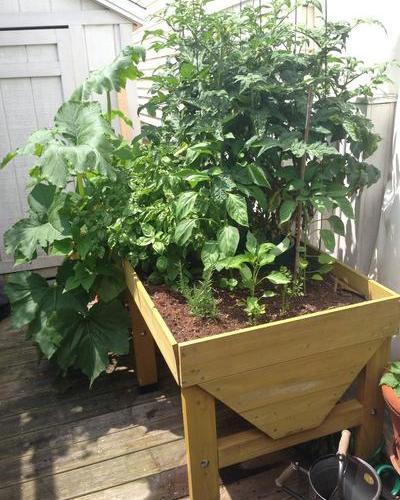
Supporting Taller Plants
It you’re growing larger plants, like tomatoes, the company offers a support cage for $24.95. I used it for growing tomatoes and found that it worked adequately. However, it took a lot of adjusting to assemble, the plastic zip ties that held it together got brittle and broke after a few months, and the shock cord inside the supports snapped when I disassembled the cage at the end of the season. I don’t recommend buying the support cage, although you’ll definitely need some kind of support when growing tomatoes and the planter isn’t deep enough to be able to stick a tomato cage or support into the potting mix.
Recommendation
 The GrowBox makes it easy to grow vegetables and flowers in a small space. It’s relatively simple to put together (if you do it carefully), small enough to move when needed, and works as promised. The Nutrient Patch takes the guess-work out of feeding your plants as they grow. I’d have liked to see sturdier and longer pins to hold the cover down but overall give it a four-shovel rating.
Update May 2016: The GrowBox is still working well. The color doesn’t appear to have faded and the tomatoes growing in it are doing well. I didn’t use a Nutrient Patch this year but did add significant amounts of organic tomato fertilizer. And I built my own support cage using bamboo stakes in the corners and twine strung between the stakes – it seems to be working well and was a lot easier to set up than the Garden Patch support system.
Where to Buy
The GrowBox is available directly from Garden Patch for $29.95 ($8 more for the designer colors, like the eggplant reviewed here), plus $6.95 S&H. A replacement Nutrient Patch is $8.95, or $13.95 for the organic version.
The GrowBox is also available on Amazon, as is the nutrient patch, but they cost slightly more.
And now over to you – Have you tried a self-watering outdoor planter for veggies? How did it work? Let us know in the comments below!
And if you liked this review, why not sign up to get reviews by email.
Disclaimer – GPReview would like to thank Garden Patch for giving us a free GrowBox to review and Renee’s Garden Seeds for providing the lettuce seeds. There was no expectation that it would be a positive review and we received no compensation for writing it. All opinions expressed here are those of the author based on personal experience using the product.
Other Outdoor Planter Reviews
 SimGar
 VegTrug
 Living Wall from GroVert