
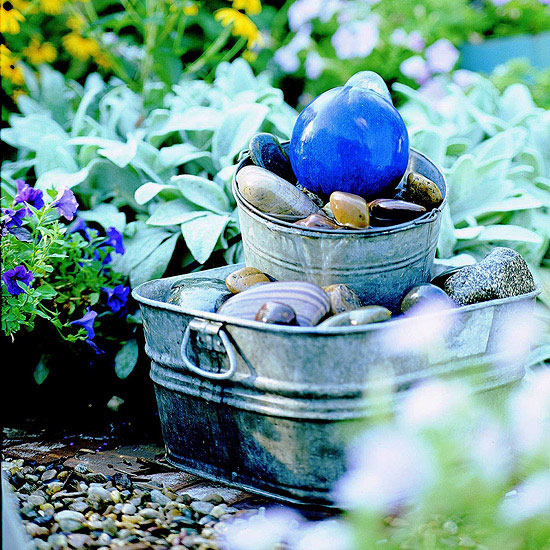
Fountains are a popular garden accessory, offering sights and sounds that relax and refresh. This do-it-yourself tub fountain costs relatively little and is small and portable enough to move anytime. Follow our step-by-step instructions for a quick and easy fountain fix.

continue reading below
What You Need
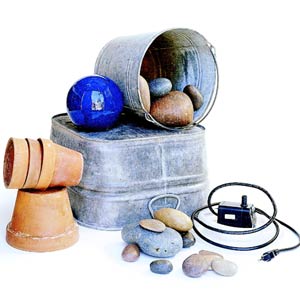
- One submersible fountain pump, with at least 2 feet of tubing. You need only a small pump for this project: 100 gallons per hour or less.
- One square galvanized tub (ours is about 18×18 inches).
- Several clay pots or other filler (such as aluminum cans or foam blocks). These fillers will reduce the volume (and weight!) of rock needed to fill the tub and bucket.
- Fifty pounds of river rock, various sizes. Depending on availability, cost, and personal taste, you may want to consider other types of rock. Rinse the rock (and other materials) before you begin construction.
- One galvanized bucket, about 10 inches in diameter.
- One ceramic or glass gazing ball, 6 to 8 inches in diameter.
Step-by-Step Instructions
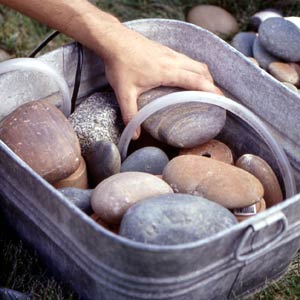
1. Start by placing the pump, with tubing attached, in the bottom of the tub, making sure the intake faces downward. Fill the bottom of the tub with upside-down clay pots (or other filler).
2. Then place a layer of rocks over the pots, but don’t pile them all the way to the tub’s rim yet. Make sure the tubing is positioned where you plan to set the bucket. (The tubing will run up through a hole in bottom of the bucket.) Run the pump’s power cord up and out of the tub.
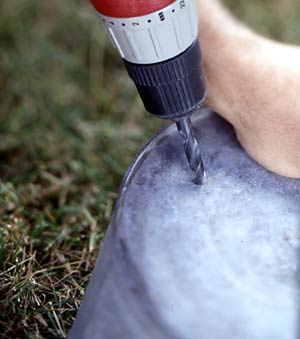
3. Drill a hole in the bottom of the bucket,close to the edge. The necessary hole size will depend on the particular pump and tubing you use, but it should be no larger than the minimum that will accept the tubing. This could require a fairly large drill bit, perhaps 3/4 inch or more. If you don’t have a bit that large, you can drill several smaller holes in a tight cluster then use a hammer to drive a chisel through. Use a file to remove any sharp points.

4. Run the tubing up through the hole in the bottom of the bucket. The end of the tubing should extend at least several inches above the bucket’s top rim. Place the bucket in its final position within the rock-filled tub. In our example, the bucket is in one corner, but you could also place it in the center. If you want to tilt the bucket so the water will spill over one side, place a rock or two under the bottom of the bucket to give it the desired tilt.
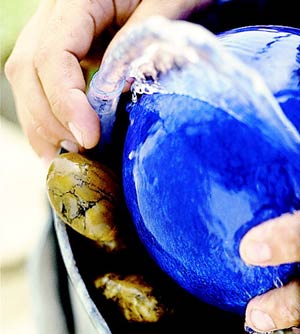
5. Fill the remainder of the tub and the bucket with rocks, being sure to keep the tubing in place. Set the gazing ball on top of the rocks in the bucket, running the tubing up its back side (opposite the side from which the fountain will be viewed).
You’re now ready to place the fountain in your favorite garden spot and fill the tub. After you’ve added water, plug in the fountain pump. Adjust the tubing so the water creates the pattern you like best. Use rocks to hold the tubing in place.
Slight adjustments to the tubing can alter the fountain’s pattern, making it easy to change the look, sound, and amount of splash the water produces.
The fountain can lose water quickly by evaporation and splashing, so be sure to check the water level before each use.
SOURCE:http://www.bhg.com/gardening/landscaping-projects/water-gardens/gazing-ball-bubbler-fountain/