
A lot of our craft ideas come from looking at a piece of “trash” and wondering, “what learning activity could we do with this?” The same is true for this activity! This shape sorter is made from an old formula can. Here’s how to make one.
Materials:
- blocks of various shapes
- a container with a large lid (we used an old formula container. Oatmeal will work, too.
a pen
- scissors or an Xacto knife
- a piece of construction paper (optional)
- a permanent marker (optional)
- glue (optional)
Instructions
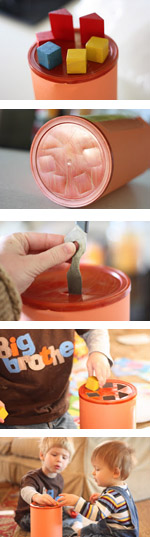 Color the top of the container with your permanent marker. You could also paint it, but don’t use tempera paint, as it will flake off.
- If you’d like, cover the container with a piece of construction paper using glue.
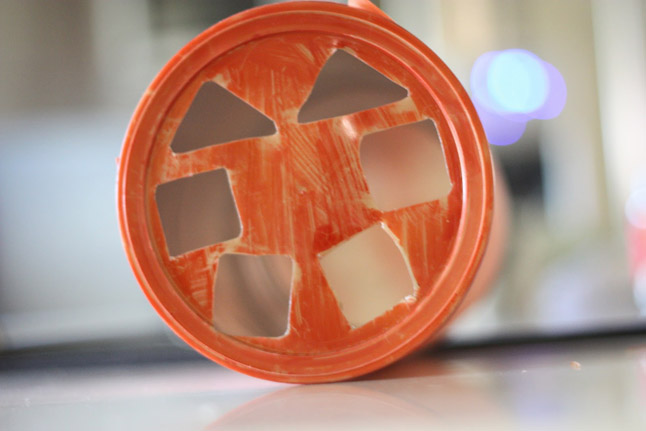
- Place the lid on the container. Then, lay the blocks on the lid and trace each shape with a pen. Press down hard enough to leave an outline of each shape.
- Use scissors or an Xacto knife to carefully poke a hole through the lid for each block shape. After you have penetrated the plastic, it should be easier to use regular scissors to cut the shapes out. The plastic lid we had did not leave sharp edges at all, but if yours does, I would recommend finding a different container/lid.
Once all the shapes are cut out, see if your little one can find the right openings for each shape!
SOURCE:http://www.pbs.org/parents/crafts-for-kids/diy-shape-sorter/