
Everything in this slideshow
-
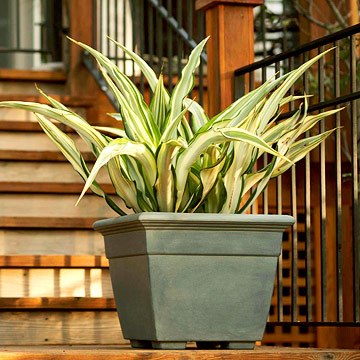
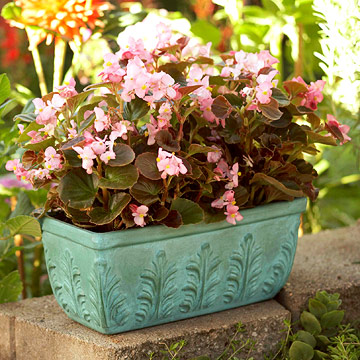
Create the Look of Lead
Antique lead planters can be expensive, but you can mimic their weighty garden presence with this budget version, which begins with a square plastic pot. Thoroughly clean the planter with detergent and water. Allow to dry, then wipe clean with a tack cloth.
-
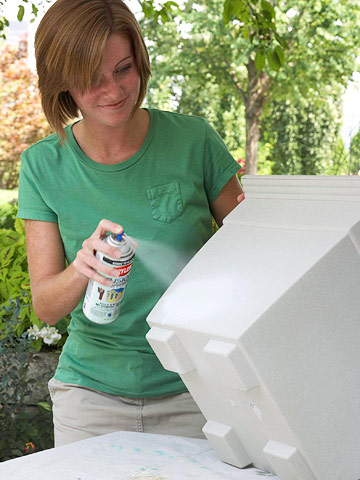
Apply the Undercoat
Step 1. Spray the planter with Krylon Fusion for Plastic spray paint in Satin White, following label instructions. Allow the paint to dry.
-
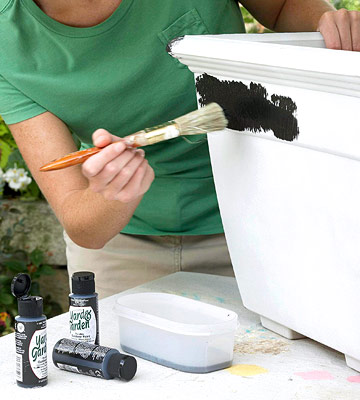
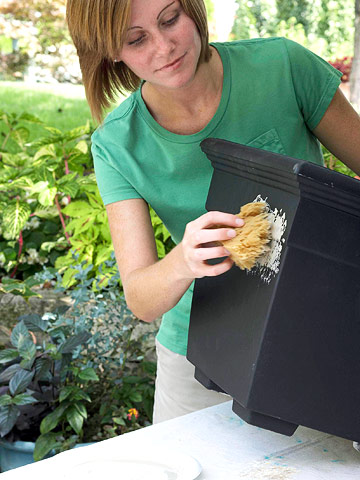
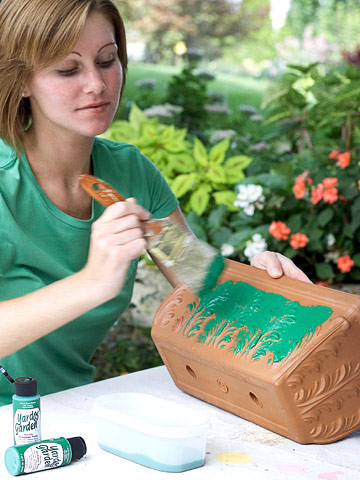
Apply the Base Coat
Step 2. Paint the sides, bottom, and inner lip of the planter, using Anita’s Yard & Garden Durable Outdoor Paint in Wrought Iron. Stipple to avoid the texture of brushstrokes. Allow to dry, then paint a second coat in a similar fashion. Let dry.
-
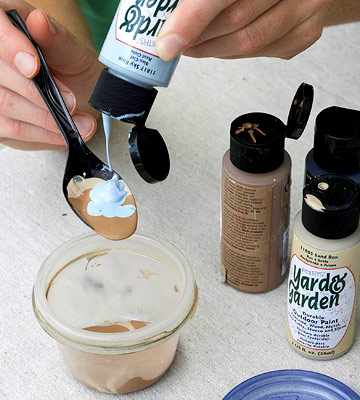
Mix the Glaze
Step 3. Mix the lead glaze in a small container with a tight-fitting lid, using the following quantities of Anita’s Yard & Garden Durable Outdoor Paint: 2 teaspoons Sky Blue, 4 teaspoons Sand Box, 1/2 teaspoon Garden Path, and 1-2 drops Wrought Iron. Add 6 teaspoons water; cover and shake to mix. (These amounts are approximate and do not need to be painstakingly measured.)
-
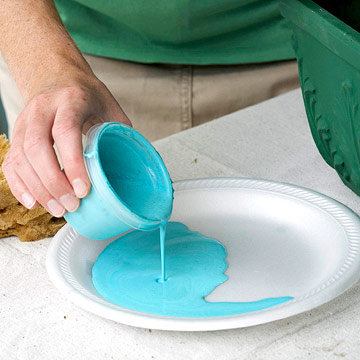
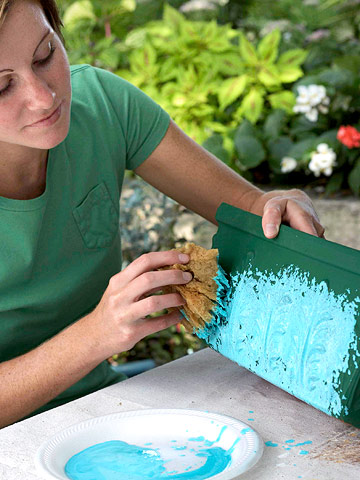
Apply the Glaze
Step 4. Pour the glaze onto a disposable plate. Dab the glaze onto one side of the planter with a wet but wrung-out sponge.
-
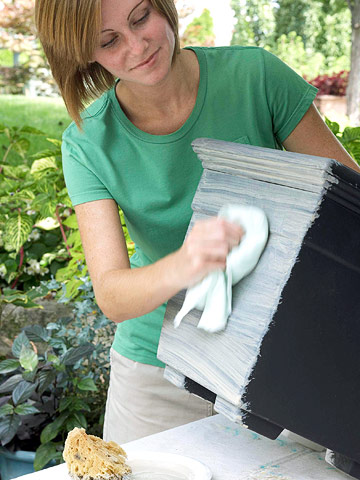
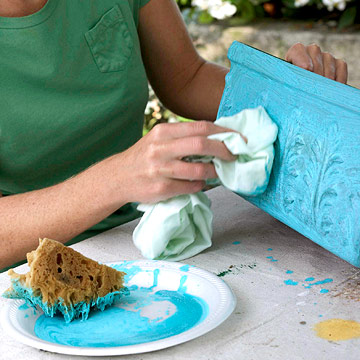
Buff the Glaze
Step 5. Wipe the glaze horizontally with a dry rag, then buff in circles to soften. When you’ve achieved an even finish, apply glaze to the other sides, carefully blending at the edges. Finish by glazing all four sides of the inner lip. Allow to dry for several hours or overnight.
-
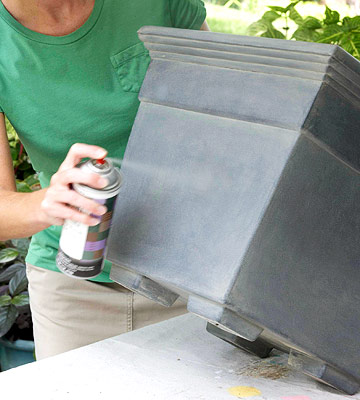
Protect the Finish
Step 6. Repeat steps 4 and 5, if desired, adding a second layer of glaze to further soften the finish. Spray with several coats of Design Master Clear Finish in Matte for protection, following label instructions.
-
Turn Terra-Cotta into Copper
Verdigris, a weathered copper finish, gives objects a rich and venerable look. This decorative technique works best on surfaces with crevices and raised details, such as this Italian terra-cotta planter. Thoroughly wipe down the planter with a tack cloth. If washing is necessary to remove soil, allow the planter to dry overnight.
-
Paint the Pot
Step 1. Paint a coat of Anita’s Yard & Garden Durable Outdoor Paint in Fern Green onto the entire piece inside and out, working the brush into all crevices. Allow to dry thoroughly. Follow with a second coat, if necessary, for complete coverage.
-
Mix the Glaze
Step 2. Mix the verdigris glaze in a small container with a tight-fitting lid. Use 3 teaspoons DecoArt Patio Paint in Blue Bahama and 3 teaspoons water; cover and shake to mix. Pour the glaze onto a disposable plate.
-
Apply Glaze
Step 3. Sponge or brush glaze onto one side of the planter.
-
Remove Excess Glaze
Step 4. Gently remove excess glaze by blotting and rubbing with a dry rag. The undercoat of dark green will be slightly revealed from raised areas, emphasizing the decorative motif. Repeat on all sides then allow to dry for several hours. Apply a second coat, if needed, to even out the finish. Spray with several coats of Design Master Clear Finish in Matte for added protection.
-
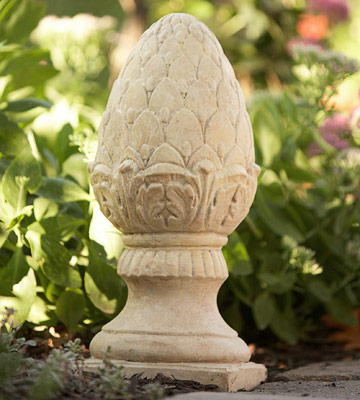
Imitation Limestone
A faux-limestone finish transforms this concrete pineapple — a traditional emblem of hospitality — using an easy sponging technique. Start by briskly wiping down the concrete piece with a stiff-bristle brush. (If you prefer soap-and-water cleanup, wash and rinse, then allow to dry overnight.)
-

Prepare the Paint
Step 1. Without mixing, squeeze small pools of Anita’s Yard & Garden Durable Outdoor Paint in these four colors onto a disposable plate: Buttercup Field, Sand Box, Garden Path, and Moon Flower.
-
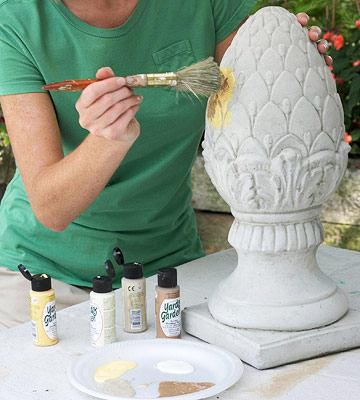
Apply the Paint
Step 2. Stipple paint onto the concrete surface with a dabbing motion, pushing the bristles into small cracks and crevices. Because limestone shows variations of cream, brown, and buff, vary the colors as you paint, mixing them on the piece itself. For large objects, paint one section at a time.
-

Blot Colors and Finish
Step 3. Using a damp sea sponge, gently blot and blend the paint colors. Keep layering on paint and dabbing the surface to replicate the texture of limestone. You can slide the sponge in some areas to create a smoother look, then sponge lighter or darker accents on top. When you are satisfied with the appearance, allow to dry. Spray with several coats of Design Master Clear Finish in Matte for added protection.
-

SOURCE:http://www.bhg.com/gardening/container/plans-ideas/decorate-your-containers/