
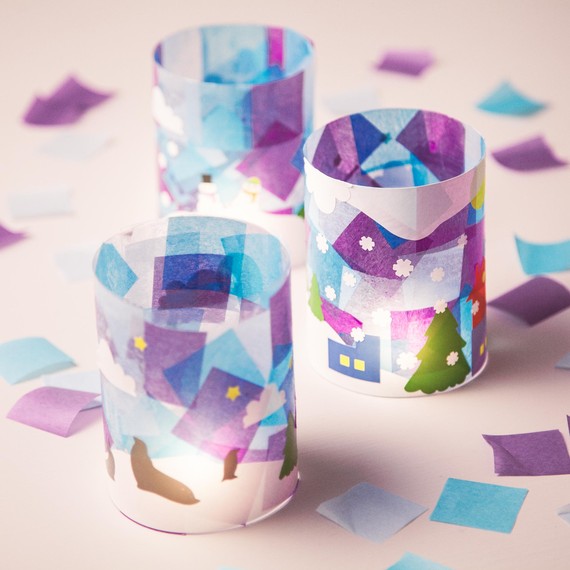
Winter brings all kinds of wonderful opportunities to have fun indoors. My kids loved cuddling up by the fire and taking part in this DIY one afternoon. We decided to brighten up our home by making some winter luminaries.
This project encourages budding artists to create something they can be proud of. Each luminary is truly unique. It is wonderful to see the kids transform something as simple as clear sheets into a glowing, working masterpiece in just one afternoon.
This project also provides a great opportunity to discover how light shines through different-colored tissue paper. We discussed how the light would shine brighter through the lighter colors of tissue paper and got the kids to explain why they thought this happened.
If you want to extend the fun even further, ask your kids to explain the story behind their art. It was wonderful to see my kids’ imaginations at work as they explained how their penguins lived and the adventures they went on.
This was a perfect way to spend an afternoon together and make fond family memories. My kids couldn’t wait to go to bed and see their winter luminaires lit up their rooms!
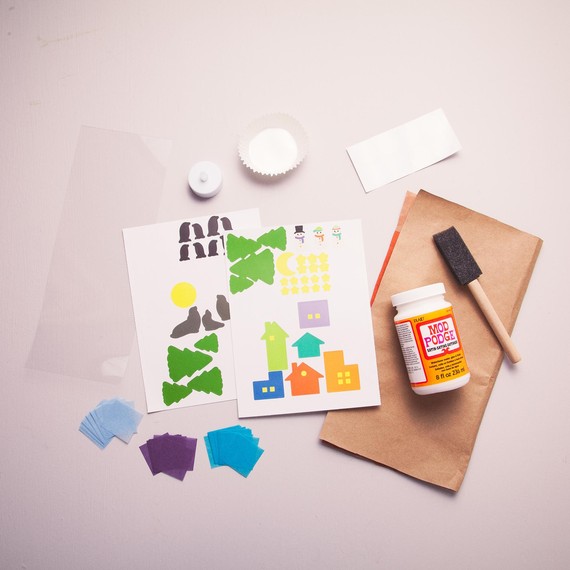
Materials:
-
1 mess mat or paper bag
-
7 circular clear stickers (you can substitute with clear tape)
-
1 small piece of vellum
-
1 tube of Mod Podge
-
1 paint tray
-
1 foam brush
-
1 pack of colored tissue paper cut into small squares
-
1 pack of winter-themed stickers
-
1 battery-powered tea light
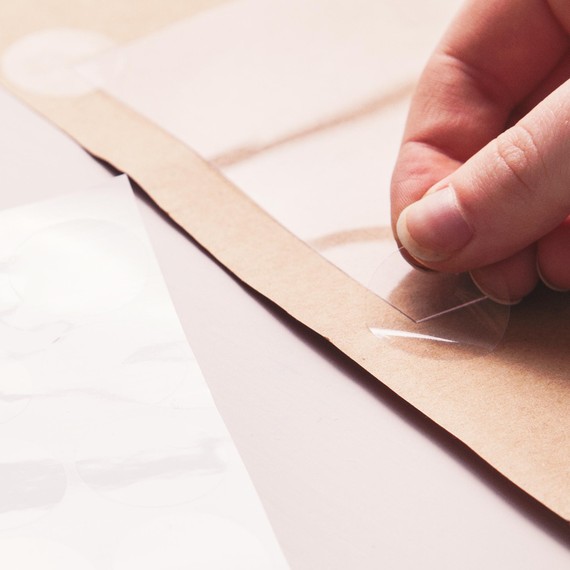
Step 1:
Cover your workspace with your mess mat or paper bag. Use four clear circular stickers to stick down a clear vellum sheet to your mat or bag.
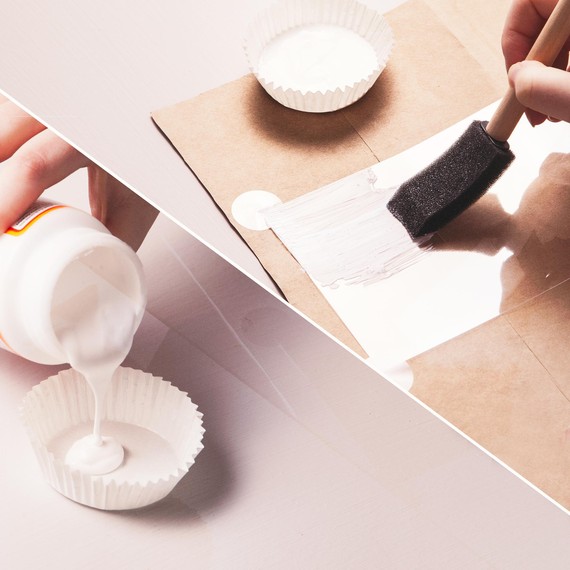
Step 2:
Open your Mod Podge and pour some into your paint tray. Brush the Mod Podge over the entire clear sheet.
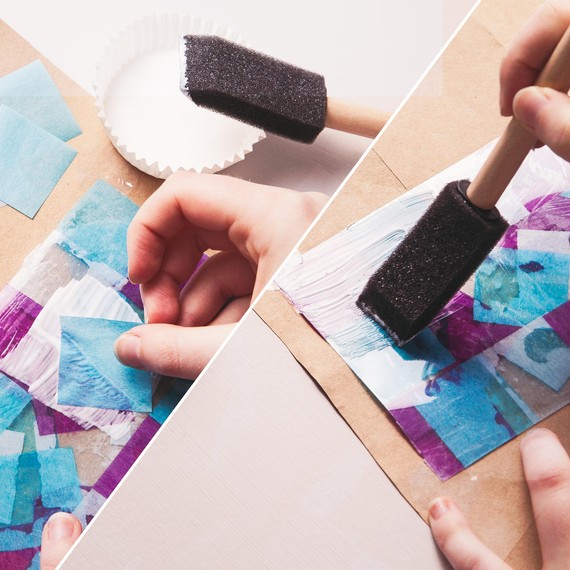
Step 3:
Stick on enough tissue paper squares to cover the clear sheet. Then lightly brush over the clear sheet with the Mod Podge again. Let the Mod Podge dry completely before continuing.

Step 4:
Add some stickers to create a wintry scene!

Step 5:
Roll your clear sheet into a cylinder and use the rest of the clear stickers or tape to hold it closed. Turn on one of the tea lights and place your luminary over it.
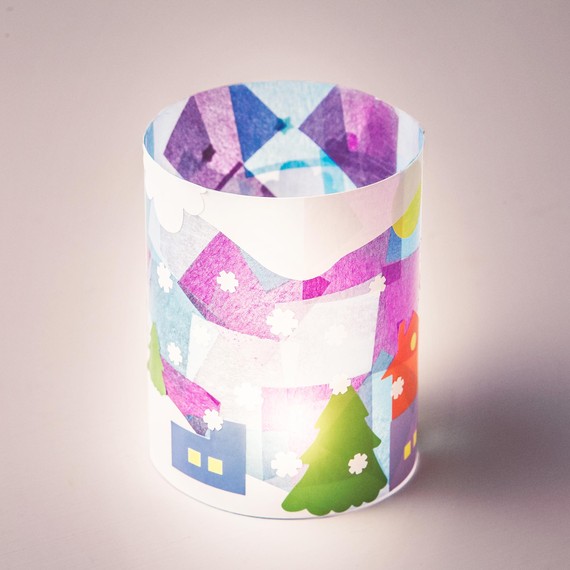
Step 6:
Set up your luminary in a dark place to admire its beautiful glow!
Looking for more exciting projects you can do with the kids? Kiwi Crate makes it easy by supplying everything you need to make 2 – 3 fun, educational projects each month!
SOURCE:http://www.marthastewart.com/1102026/luminaries-kids-craft