
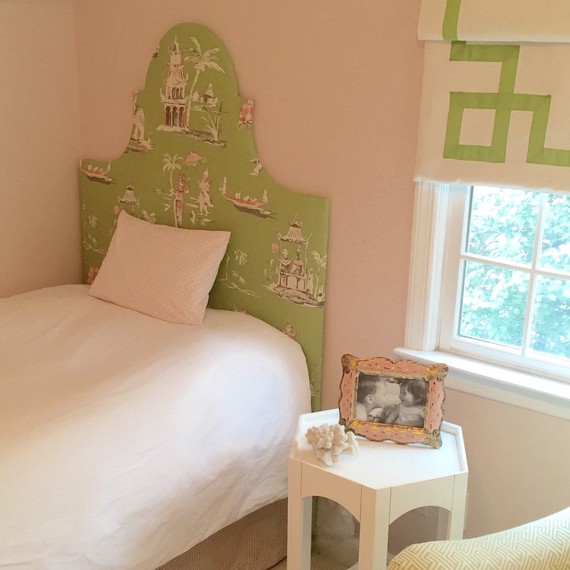
I envisioned a pretty, upholstered headboard in our little girl’s room. But I just couldn’t believe the prices! So I decided to take matters into my own hands — DIY headboard, here I come.
Determined to make the process as straight-forward (and inexpensive!) as possible, I did a ton of research in advance. I’m happy to report that I cracked the code. Follow these four simple steps to make your own upholstered headboard.
Materials
- 1 piece of plywood or MDF (medium-density fiberboard)
- paper and pencil
- hand saw
- scissors
- 2 packages of light cotton batting
- 1 piece of fabric large enough to cover the front of your headboard, plus 2-3 inches
- staple gun
Directions
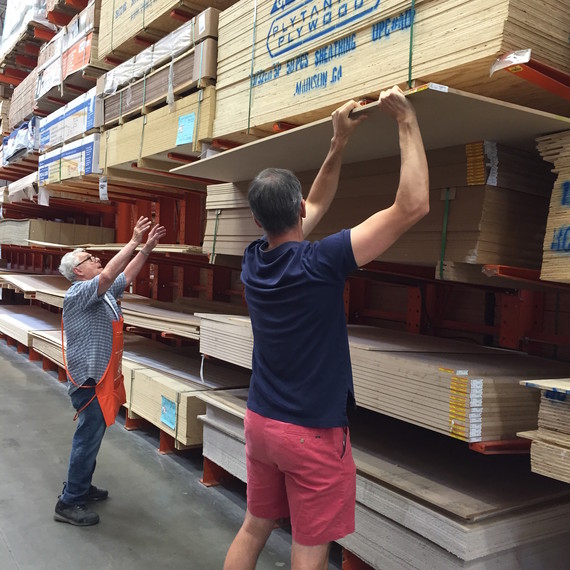
Step 1: Purchase the Right Foundation
I suggest you purchase a sheet of MDF (medium-density fiberboard) from your local hardware store. At just a few dollars, it’s much cheaper to buy and easier to cut than plywood. It’s perfect for a project like this! Make sure you measure your bed beforehand to get the right sized rectangle.
A tip on size: I was dealing with a twin bed so I made sure the piece was just over 38 inches wide (the width of a standard twin bed). In terms of height, I wanted the headboard to be high and make a real impact, so from the floor to the tippy top of the headboard the rectangle board was about 60″ high. I encourage you — with a partner — to figure out what height is right for you. Just take a tape measure, start measuring from the floor, and eye ball how high you want the headboard to go. You might want to draw a faint line in pencil on the wall to be sure you like the height. Sheets of MDF come in standard sizes, so make sure you have the store cut the rectangle to your exact specifications in-house before you walk out with it.
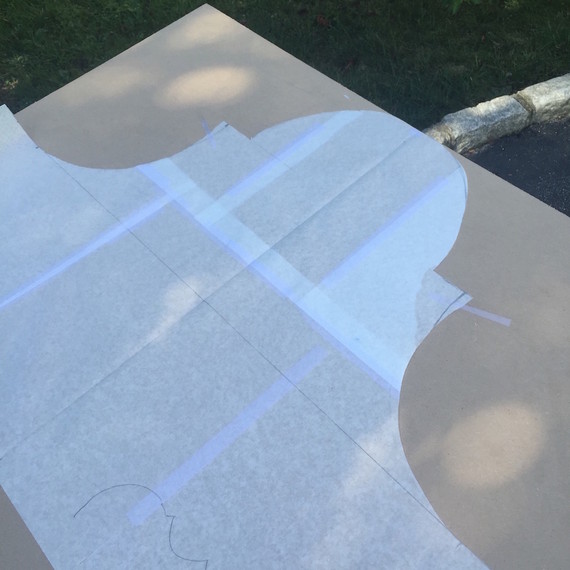
Step 2: Create Your Headboard Shape
A word to the wise: Creating a “fancy shape” is more involved than just sticking with a rectangle. At the end of the day, I thought it was worth it, but if you don’t have access to a handsaw and/or you think you’d be satisfied with a rectangle, then I say skip this part altogether and move ahead to Step 3.
Here’s how I created my “fancy shape:” I took a huge piece of paper, folded it in half, and then drew one side of the headboard. When unfolded, there was my perfectly symmetrical headboard shape!
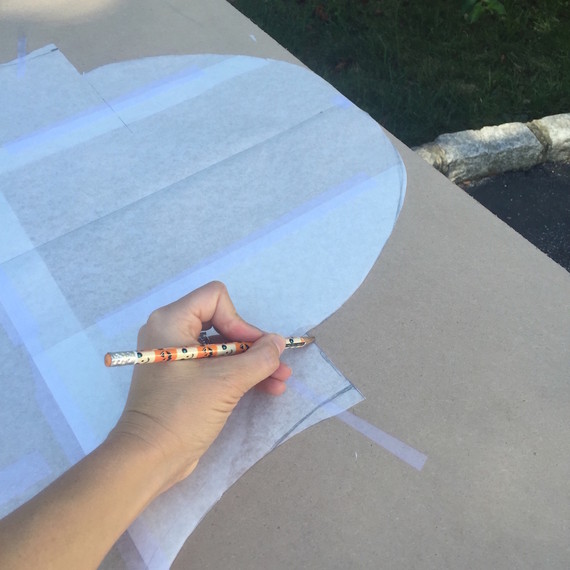
Then, I traced the shape onto the MDF using a pencil.
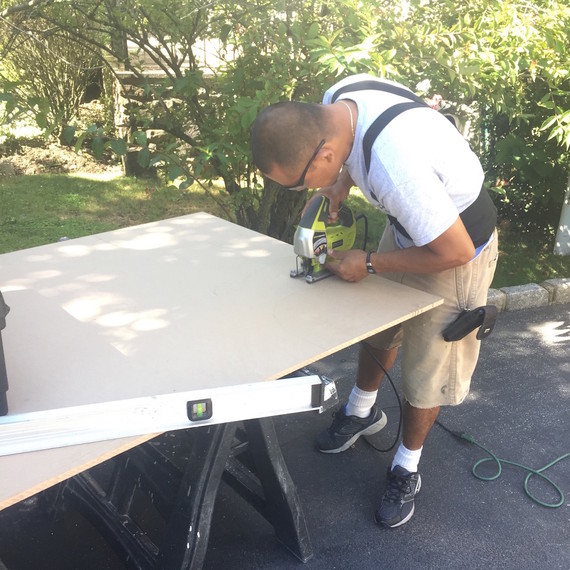
Because I don’t own a handsaw, I called on my partner-in-crime George, who has all the right equipment. It took just a few minutes for George to cut along my pencil lines.
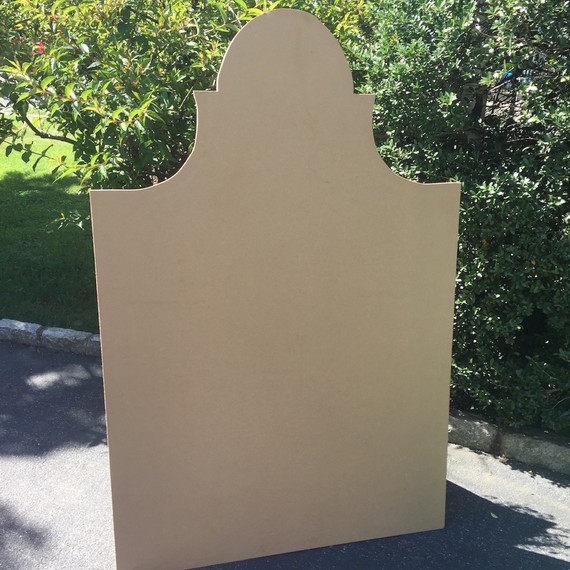
Ta da!
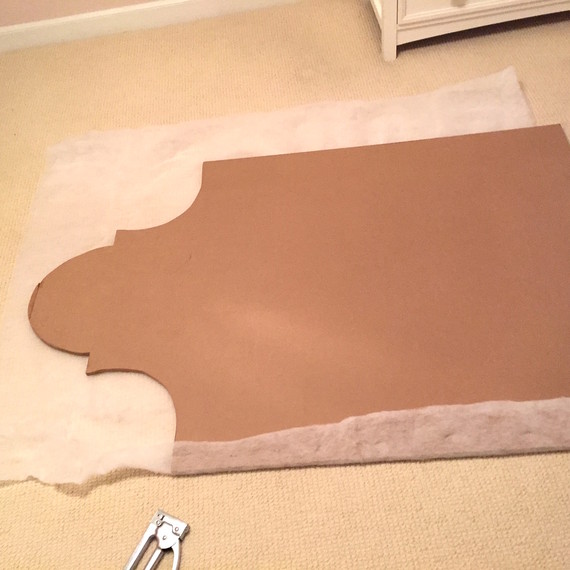
Step 3: Break out the Batting
In order to create a soft cushioned look for my headboard, I decided to use a layer of cotton batting. I’d seen many tutorials on the internet calling for the use of thick foam for a super cushioned look, but it just seemed too complicated to me (not to mention unruly and difficult to cut). I have to say, a simple layer of cotton batting was all I needed.
I found cotton batting at my local craft store for just a few dollars (you can also find it online).
For my twin-sized headboard, two packages of 46″ x 60″ light cotton batting was perfect. You just want a size big enough to cover the front of your headboard.
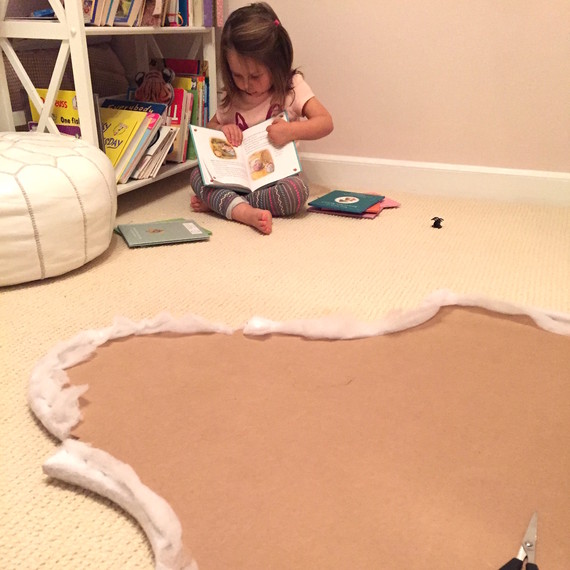
I lay the cotton batting on the ground and placed the headboard on top of it. Then, I pulled the edges around the back and using my staple gun, stapled every 6 inches or so to make sure the batting was on tight.
I then cut away any excess batting with my scissors.
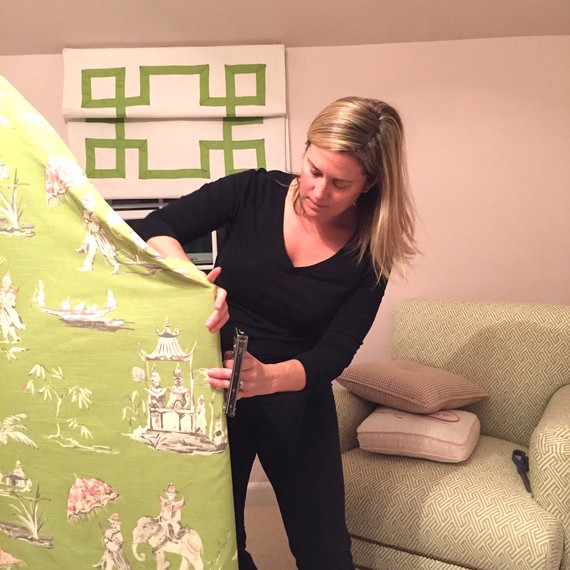
Step 4: Time for Fabric
This is the most exciting part!
Lay your fabric on the ground, and place the headboard on top of it. Make sure the pattern is straight and positioned just how you want it. Also, make sure your fabric covers the entire front of the headboard, from top to bottom.
Then, pull the fabric taut and staple the edges to the back.
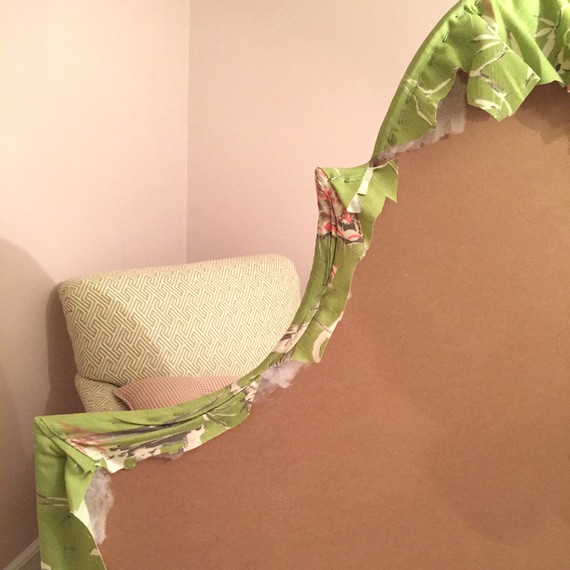
I cut off the excess fabric in the back because I wanted my headboard to lay flush against the wall. And you’ll also see that on the corners I simply folded the fabric and stapled it in place, almost like I was wrapping a birthday present.
To “install” the headboard, I just placed the headboard on the floor — flush against the wall — and pushed the bed up next to it.
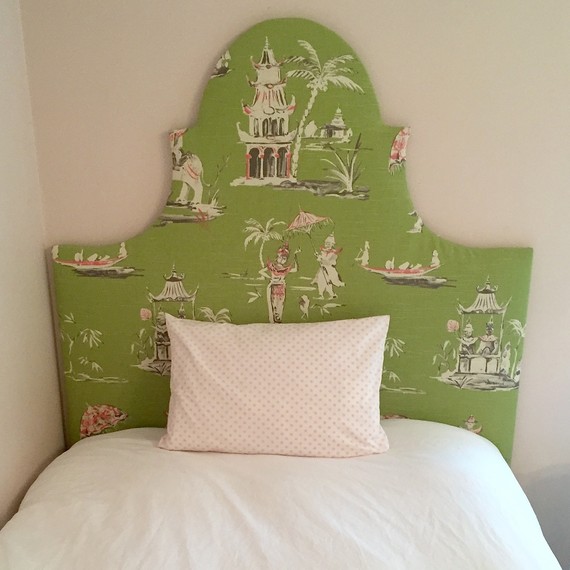
So there you have it! A custom upholstered DIY headboard in just a few steps and for only a few dollars. I loved this project because it was fun to experiment and I had my heart set on a “fancy shape,” but next time I think I’ll just stick with a rectangle shape and cut my DIY time in half. Lesson learned!
SOURCE:http://www.marthastewart.com/1501538/super-cute-diy-headboard-you-can-make-just-few-bucks