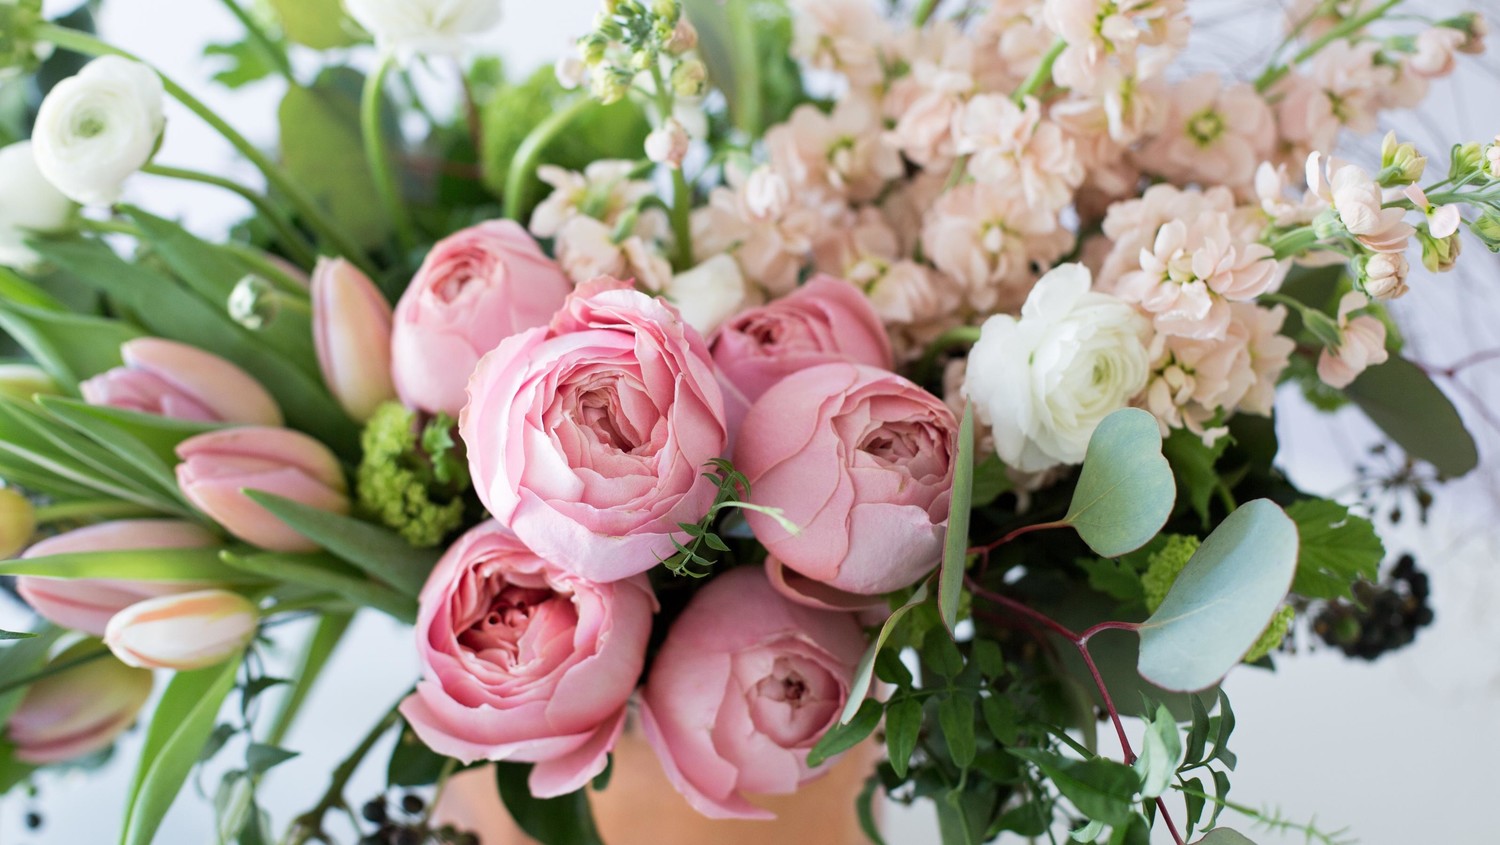
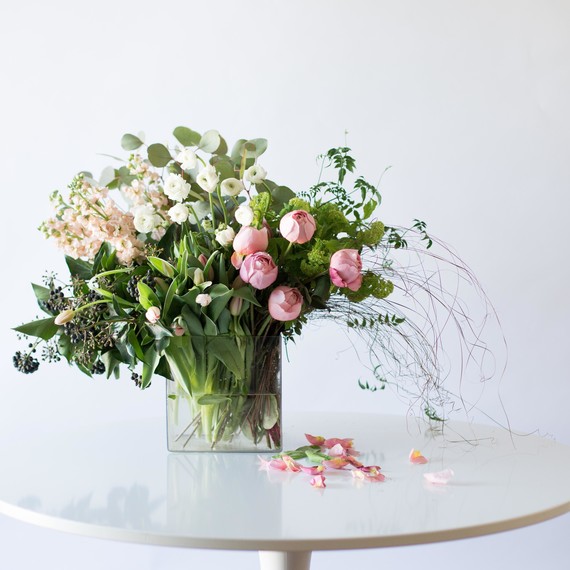
The coming of spring brings a bounty of gorgeous flowers to choose from. As a florist, I often find I am spoiled for choice at this time of year. In this tutorial, I will show you how to arrange a variety of pink flowers in groupings, giving this bouquet maximum punch. This DIY uses lots of blooms, but I also chose to include some unexpected elements of foliage and texture to keep things interesting.
When choosing flowers for your bouquet, always remember to use seasonal, locally grown flowers whenever possible. You can even try adding a snippet or two from your own garden or backyard for a completely unique bouquet. To create a clean and uncluttered look, use blooms in varying size, in coordinating shades, that are grouped in a strong, intentional manner. To make them stand up correctly, snip the stems on a sharp angle before placing them in the vase. If you want your bouquet to last, don’t forget to refill your vase with fresh water each day!
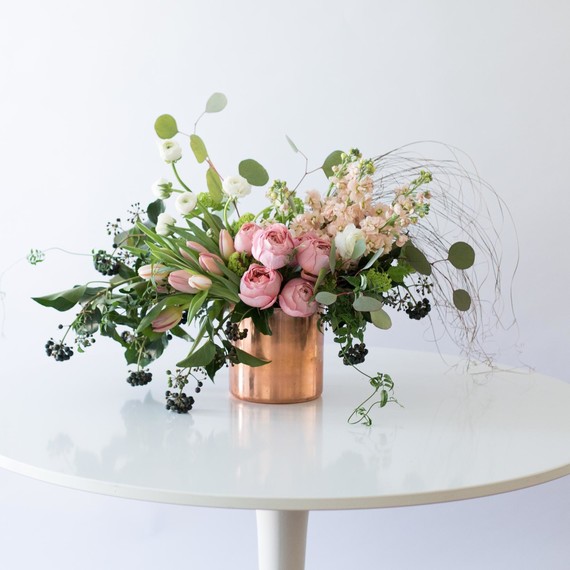
Flower blooms I used for this bouquet:
– 7 ranunculus – round head with a curved stem
– 6 pink romantic antique roses – bold color
– 5 peach matthiola – straight and tall, linear
– 15 blush tulips – teardrop heads, curved stems
Romantic foliage:
– Jasmine vine – free-flowing
– Silver dollar eucalyptus – soft and rounded
Texture (my signature look!):
– Dried grasses – irresistible bends and curls
– Wild grape ivy – beautiful movement and lush dark fruits
– Viburnum – tiny bright green flowers — to help open up the arrangement
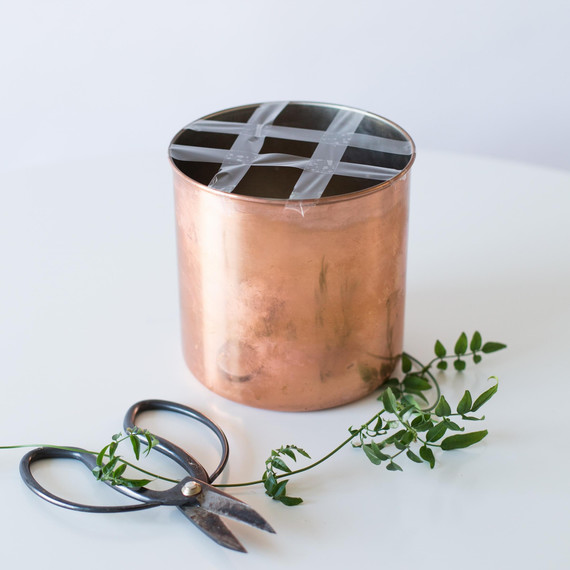
The base for this arrangement can be made with items you already have in your home.
Materials
– a sturdy vessel or vase
– clear cello tape
– floral snips
Step 1: Creating a grid
Fill your vase 3/4 of the way up with lukewarm water. Then carefully dry the rim of the vase, inside and out. Using two pieces of tape, divide your vessel into 3 sections. Securely fashion the tape a 1/2 inch over the rim on each side. Next use two pieces of tape to further divide the vase into back, middle, and front sections. We are going to use this grid to organize our bouqet like this:
– Back section: foliage
– Middle section: flowers and texture
– Front section: focal flowers and texutre
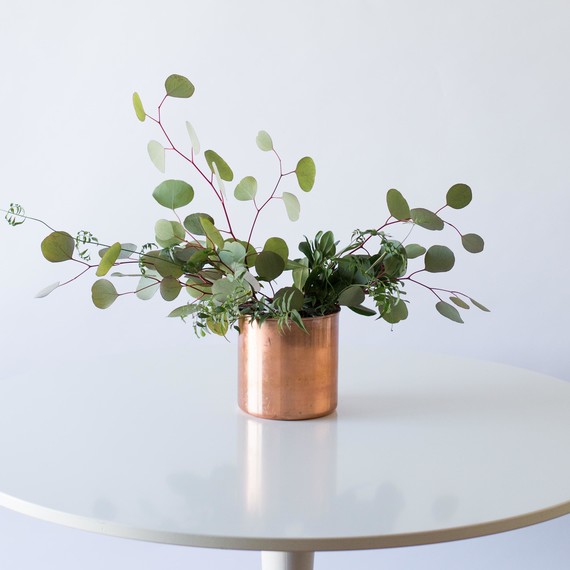
Step 2: Placing the foliage
Add a grouping of eucalyptus angling left. This will mark the highest point of your florals. On the right side, add another grouping of jasmine and shorter eucalyptus.
Tip: It is easiest and quickest to group flowers in your hand, snip them, and place them in the vase as a cluster.
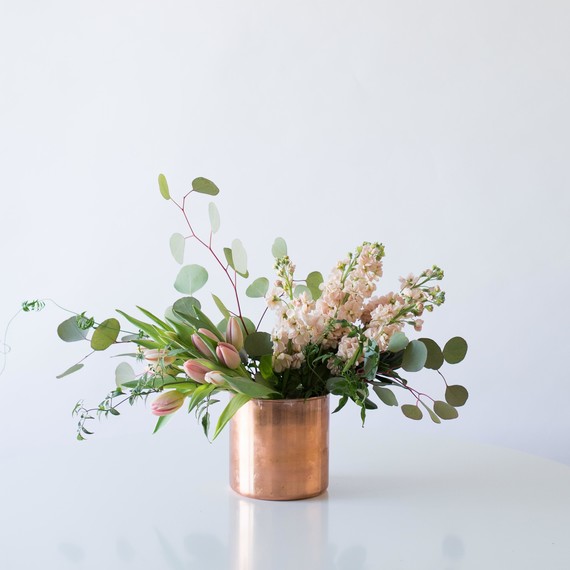
Step 3: Filling out the middle section
Cluster, snip, and place the matthiola stems in the middle right section, ensure that they are off-center. Group the tulips opposite the matthiola for a balance in color.
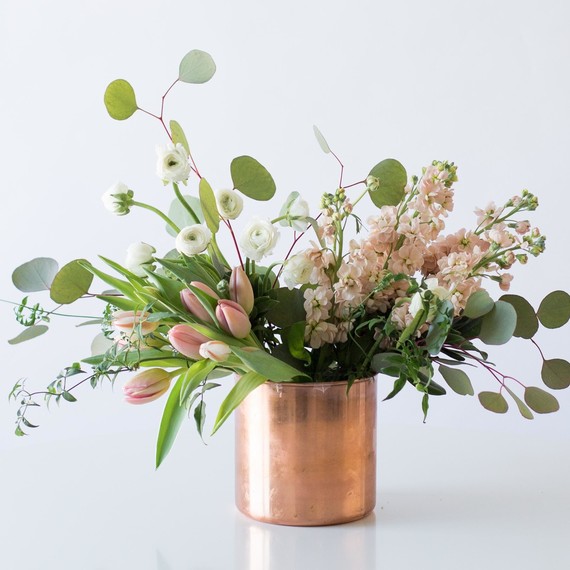
Step 4: Placing the blooms
Place ranunculus at staggering heights, complementing the movement of your tallest stems of eucalyptus. If you have trouble with this step, try arranging it in your hand before placing it in the vase.
Tip: To keep it from moving around, wrap a piece of cello tape around the stems before placing them in the vase.
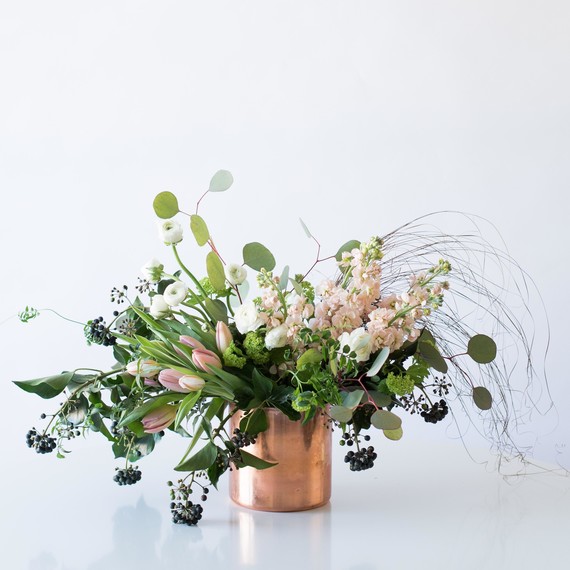
Step 5: Add some texture
Mimicking the lines of the tulips, place the grape ivy on the outside of the arrangement. Place the bright green viburnum inside the arrangement, ensuring the leave enough space for you showstopper flowers — the romantic antique garden roses.
Tip: Place the light and bright viburnum inside the arrangement to fill without losing a light, pastel look. Placing the dark berries inside will create dips and shadows resulting in a “busy”-looking arrangement.
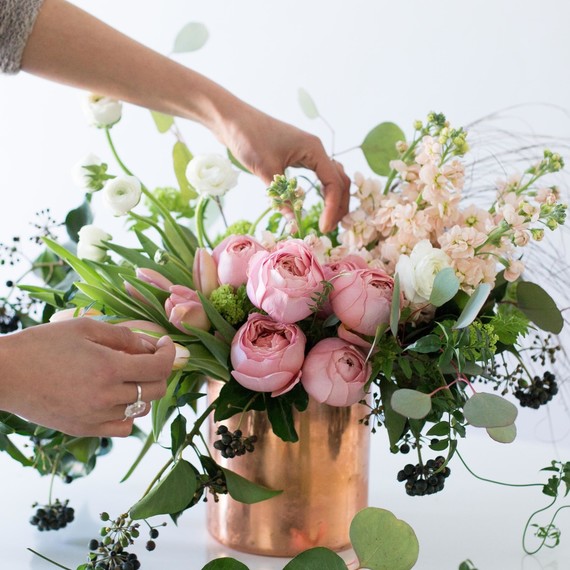
Step 6: Add the finishing touch: the roses!
Place roses in the empty space left in the front section. Group them together in your hands, varying the heights of the blooms. Allow them enough space to fully open and show off! It is best if the heads of the roses are layered — not aligned.
I hope you are inspired to try this at home! Of course, substitutions can be made for any of the flowers used. Just be sure to choose ones with a similar shape to acheive the same mood in your arrangement. Please share your creations on Instagram, Twitter, or Facebook!
Flowers by Lauren Sabo of Botany & Co., photography by Christine Pienaar of Christine Pienaar Photography.
SOURCE:http://www.marthastewart.com/1106990/spring-flowers-arrangement