

With winter right around the corner, there is no better time to get a group of friends together for a fun DIY craft night! Throwing a craft party is easy, all you need are a few basic art supplies and a fun and easy project. When I was on the lookout for a simple project for my own craft night, I had two rules: It had to be relatively easy, and it had to look good! Truth be told, I have a particular dislike for tissue boxes. Yes, they are necessary to survival, especially this time of year, but I can never find one that I want to keep out on the bedside table. With a few basic art supplies and a simple wooden tissue box, my DIY craft party of rock stars created these useful and modern tissue box covers that can take center stage as a fun addition to your home decor. A problem solved and a party: That’s a win-win.
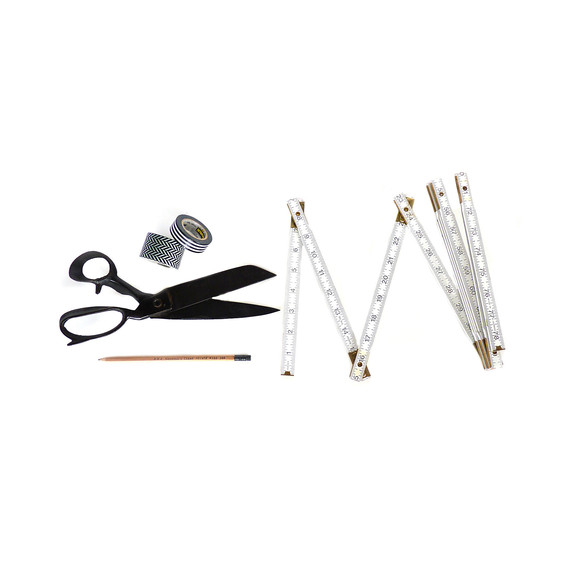
Materials:
- Unfinished wooden tissue box — I like this one from Michaels. It has a sliding bottom so your tissue box doesn’t fall out the bottom.
- Craft paint — Martha Stewart Craft Paints of course! These are easy to use and cover really well.
- Paintbrushes
- Paint palette — you can also use small paper plates
- Ruler
- Pencil
- Scissors
- Washi tape — I used a wider tape measuring 1 1/4 inches wide
How to Make the DIY Tissue Box:
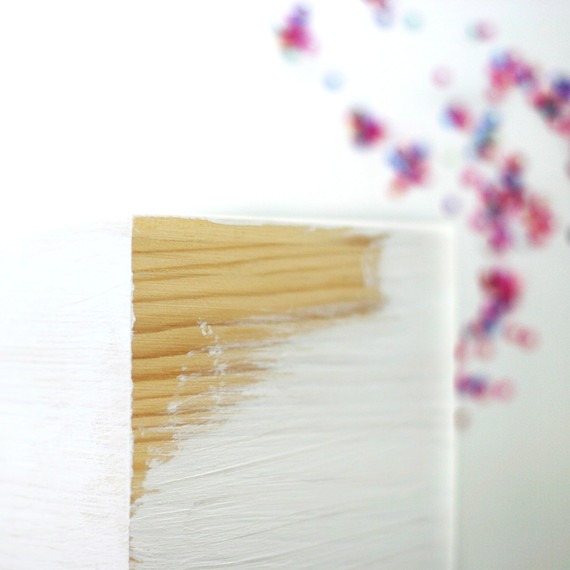
1. Paint your wooden tissue box. You will need to use a wide, flat brush and allow enough time to give it two coats of paint, especially if you are painting your box white, like we did. Allow the paint to dry one hour between coats.
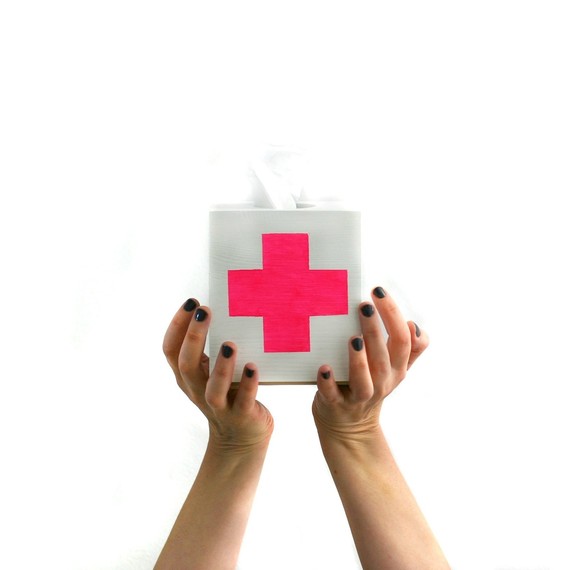
2. Measure the center of your tissue box and create a 1 1/2-inch-wide stripe down the center of your box and across your tissue box. This will help you create the cross shape in the center.
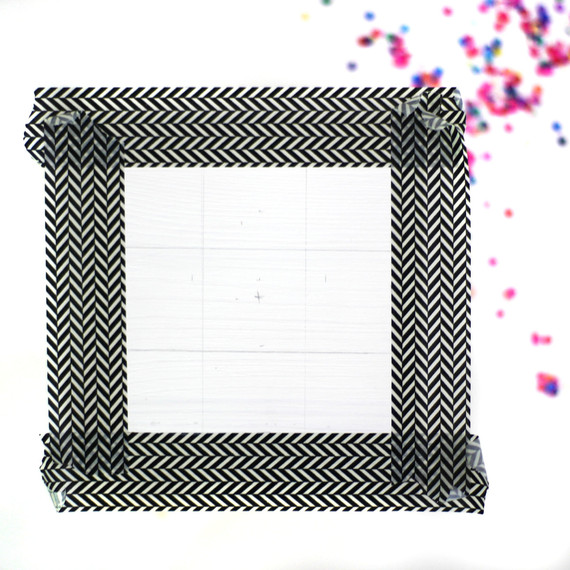
3. Begin to outline your shape with washi tape to prepare for painting. You will want to trim the tape when it comes off the roll to create straight edges. Then outline the cross shape and paint within the tape. Allow paint to dry one hour before peeling the tape away. To fix any rough edges, simply go over with the same color paint as your tissue box using a small brush.
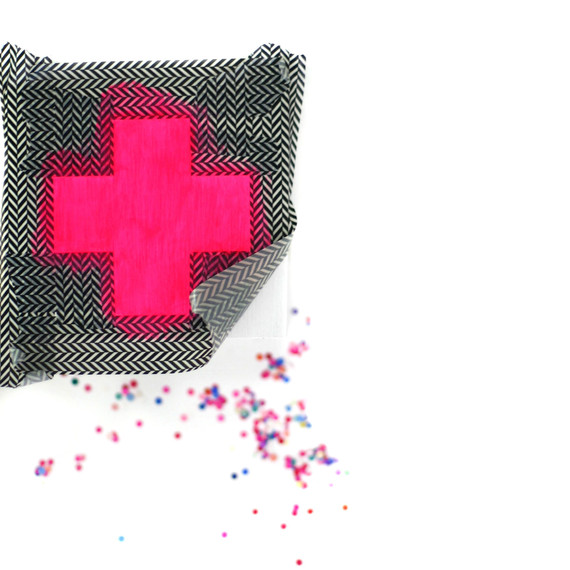
4. When your paint has dried, peel away the washi tape. To correct any rough edges, simply take a small paintbrush and paint with the same color you used to paint your tissue box. In our case, that would be white.
5. Once dry, insert your favorite tissues into the box.
Your new tissue box is ready to rock your next cold and bring a little style to your sneeze! Happy winter!!
SOURCE:http://www.marthastewart.com/1500597/diy-painted-tissue-box-cover