
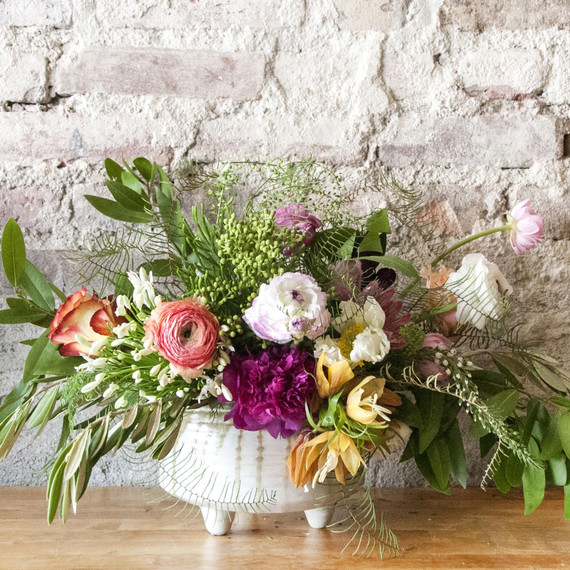
It’s no secret that flowers are the perfect way to brighten any room. We decided to put together an arranging workshop for our blog Local Creative, and were so thrilled to work with the flower goddess Aurora Botanica (also known as Rawan Rihani). Rihani is an insanely talented florist, painter, and textile artist, and all-around sweet gal. She has been cool enough to spill the beans and share the magic behind creating dreamy, lush arrangements with a natural and painterly feel. Read on for her step-by-step.
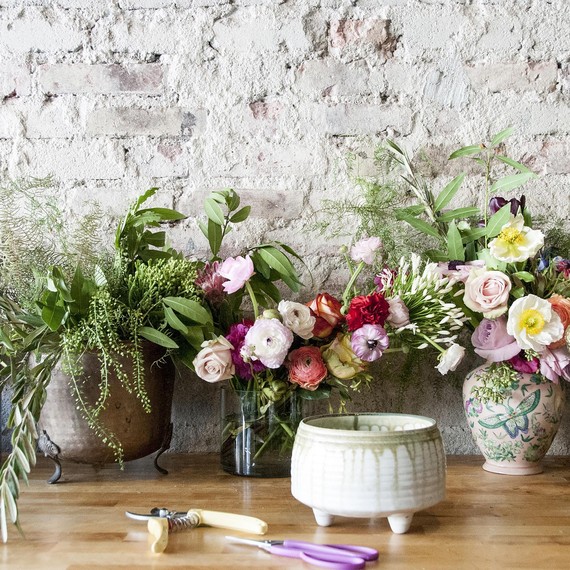
Materials:
- Flower clippers
- Low and wide-shaped vessel
- Wild textures of greenery — a mix of at least 3 different types of leaves and foliage is best
- Textured flowers and blossom flowers (foreground/”face” flowers)
For this bouquet we used:
- Wild greens: umbrella ferns, olive branches, bay leaves,
- Textured flowers: veronicas, frittilaria
- Blossom flowers: ranunculus, poppies, roses, peonies
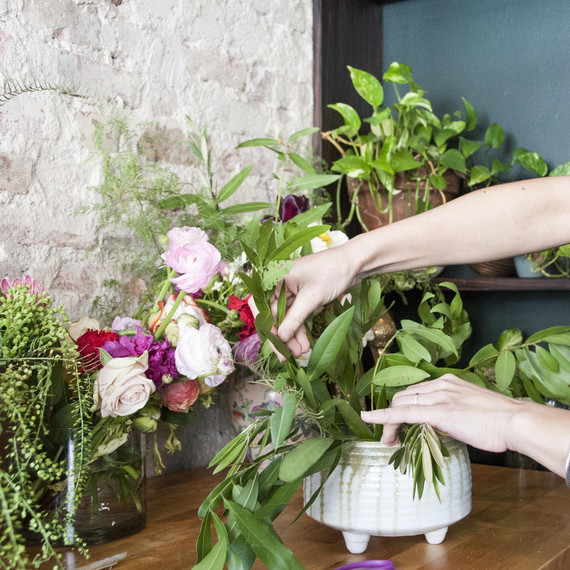
Step 1:
First insert your greens into a circle pattern around the neck of your vessel. After completing a circle in one direction, reverse to the opposite direction and interlock the stems in your base. This negates the need for flower foam; the stems will create a lattice structure that will hold the arrangement up. Doing this will also give your bouquet a more natural feel. Take another look at your vessel, and fill in negative space with more textured greens. Try to create an organic, asymmetrical shape — this will help keep the arrangement loose and natural. Also, using greenery of different lengths will create a wilder, more overgrown look.
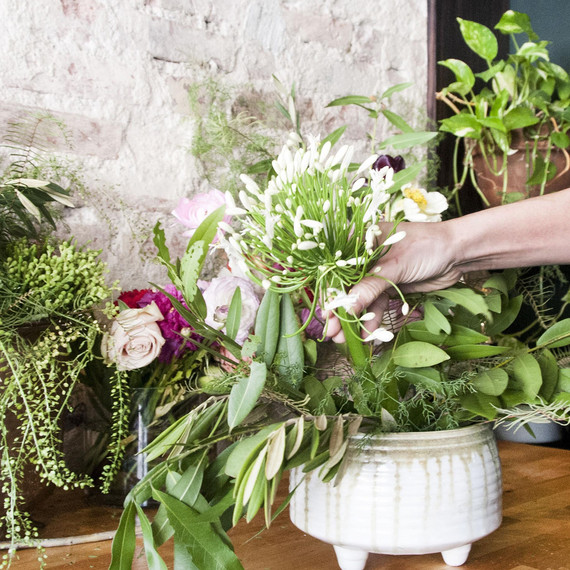
Step 2:
Now that you have a base, use your textured flowers — they will act as a “middle ground.” Cut the stems at different lengths and experiment by placing them in varying positions in your vessel.
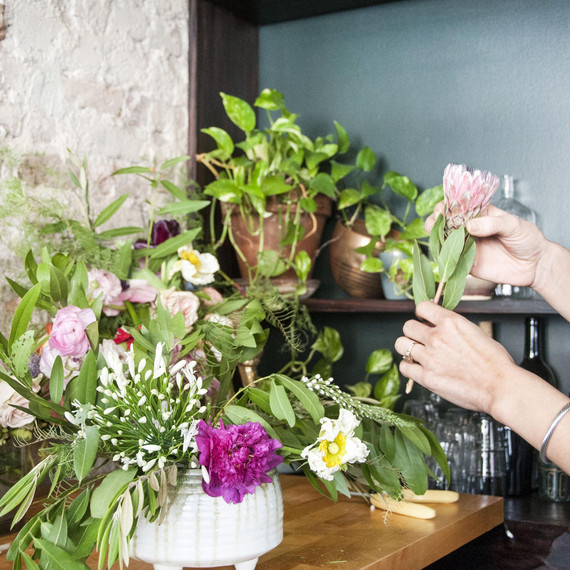
Step 3:
Time for blossoms! Roses, ranunculus, poppies, peonies — this is the fun part. Start by placing your blossoms low and and close to the vessel, then spiral out using blossoms with longer stems. Keep in mind the need to create asymmetry and use the longest stems to create a beautiful and interesting silhouette. Step back from your arrangement, then focus on playing with the composition — stopping only when it feels right.
Step 4:
Lastly, take time to polish and balance your arrangement — add and take away greens and flowers. Make sure the flowers are not compact. Each flower should be positioned loosely, this gives each flower an intent and important role in the overall arrangement. Adjust your arrangement by pushing flowers back and bringing some forward, tweaking the angles until you are happy with your design.
Voila! You have created a gorgeous, natural and painterly flower arrangement — the perfect addition to any home.
Extra tips and tricks for flower arrangers:
- Experiment with different color combinations. For example, go for an ombre color scheme using colors from cream and ivory to soft pink and a deep scarlet.
- Want to create an arrangement that will complement your favorite painting or your favorite Moroccan rug? Match the color palette of your flowers to your inspiration and you’ll be amazed by the results — it really can tie a room together.
- Flower arranging is an art, and there are no rules. Following this tutorial is a great way to start, but you can create your own method and experiment until find your own voice. Flower arranging should always be expressive and enjoyable!
Photography by Jenna Saraco.
SOURCE:http://www.marthastewart.com/1105442/4-simple-steps-stunning-flower-arrangement